
Google Authenticator MacBook: How to Use 2FA Safely on Mac
Published August 9, 2026 · Updated August 20, 2026
If you spend most of your day on a Mac, searching for google authenticator macbook seems completely logical. You sign in to Gmail, cloud platforms, social networks, work dashboards, developer services, and financial tools from your computer, so why should you have to reach for another device every time a six-digit verification code appears?
The answer is slightly more complicated than simply downloading another Mac app.
As of August 2026, Google’s official Authenticator listing on Apple’s App Store identifies compatibility with iPhone and iPad rather than listing a native macOS version. Google describes Authenticator primarily as an app that generates verification codes on your phone.
That does not mean MacBook users cannot use Google Authenticator.
In practice, a google authenticator macbook workflow normally consists of your Mac handling the login while Google Authenticator on an iPhone or iPad generates the second-factor code. Another option is to use Apple’s built-in Passwords system to generate compatible verification codes directly on the Mac.
Quick Answer
There is currently no official native Google Authenticator macOS app listed by Google. For most people, the safest setup is:
MacBook → enter password → iPhone/iPad Google Authenticator → enter verification code → sign in.
If you specifically want your verification codes available directly on your Mac, Apple Passwords can also store and generate verification codes for compatible accounts.
This guide explains every practical way to build a secure google authenticator macbook setup without confusing unofficial applications with Google’s actual product.
1. What Is Google Authenticator MacBook and Why Do Mac Users Search for It?
Google Authenticator is the second step, not the login itself
Google Authenticator is a two-factor authentication application. Instead of protecting an account with only a password, an enabled account asks for another credential—usually a temporary verification code.
The important distinction is that google authenticator macbook does not describe a special type of Google account or a separate authentication standard for macOS.
It usually describes a workflow.
You begin signing in on the MacBook, while another trusted device generates the temporary code required to finish that login.
Google says Authenticator codes can be generated even when the phone does not have an active network or cellular connection. That is one reason authenticator-based verification can be convenient when traveling or working in places with unreliable connectivity.
For example:
Step 1: Open a website in Safari or Chrome on your MacBook.
Step 2: Enter your username and password.
Step 3: The website requests a verification code.
Step 4: Open Google Authenticator on your phone.
Step 5: Enter the current code on the MacBook.
That is the standard google authenticator on macbook experience even though the Authenticator application itself may be running on another device.
Why MacBook owners want authentication directly on Mac
Convenience is the main reason users search for a google authenticator app for macbook.
Someone working eight hours a day on a Mac may authenticate dozens of sessions across email, analytics dashboards, development environments, admin panels, cloud tools, and company services.
Repeatedly unlocking a phone can interrupt the workflow.
There is also confusion created by Apple silicon. Apple allows some iPhone and iPad applications to run on Macs using Apple silicon when those apps are made available for Mac. Apple labels compatible software as “Designed for iPhone” or “Designed for iPad.”
However, availability is still determined app by app. You should not assume that every iPhone application automatically becomes a Mac application.
That distinction matters when researching google authenticator macbook.
Download Authenticator App
Secure your accounts with fast, reliable two-factor authentication. Download now and protect your login in seconds.
📖 Read More Guides: Google Authenticator 2FA: Complete Guide to Two-Step Verification
2. Can You Download Google Authenticator Directly on a MacBook?
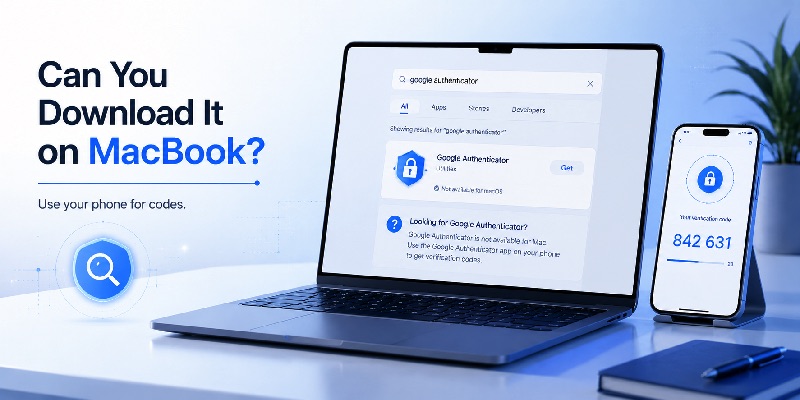
Is there an official Google Authenticator for macOS?
This is the question that should be answered before discussing installation.
At the time of writing, Google’s official App Store listing for Google Authenticator identifies iPhone and iPad compatibility and does not list macOS compatibility in its compatibility information.
Therefore, if you search the Mac App Store for google authenticator for macbook and discover applications with similar names, do not automatically assume they are made by Google.
Always check the developer.
The official Google Authenticator listing identifies Google LLC as the seller.
A third-party application can implement the same type of one-time-password standard without being the official Google application. That does not automatically make the application unsafe, but it does mean you should evaluate it separately.
What about Apple silicon MacBooks?
Apple explains that Macs with Apple silicon can run certain iPhone and iPad apps when developers make those applications available on the Mac App Store. Compatible applications receive an appropriate compatibility label.
This creates an important rule for google authenticator macbook users:
Do not assume “my Mac can run iPhone apps” means “Google Authenticator is officially available for my Mac.”
Check the current official listing instead.
The practical situation can be summarized like this:
| Option | Runs on Mac? | Official Google Authenticator? | Best for |
| Google Authenticator on iPhone | No | Yes | Most users |
| Google Authenticator on iPad | No | Yes | Users with an iPad nearby |
| Native Google Authenticator macOS app | Not currently listed | No current Mac listing | — |
| Apple Passwords verification codes | Yes | No | Apple-focused workflows |
| Third-party Authenticator App | Depends on app | No | Advanced users after careful review |
For most people searching google authenticator macbook, the first option remains the simplest because it keeps authentication on a separate trusted device.
3. How Google Authenticator Works With Your MacBook
Your Mac and authenticator do different jobs
Think of the system as two separate layers.
Layer 1: MacBook
Your MacBook connects to the service and submits your username and password.
Layer 2: Authenticator
Your authenticator provides the temporary code proving that you possess a previously enrolled authentication credential.
This separation is why google authenticator macbook works perfectly well without an official Mac application.
Suppose you are signing in to an account from Safari.
You enter:
Then your password.
The service may display:
Enter the 6-digit code from your authenticator app.
At that point, you open Google Authenticator on your phone and copy the current verification code into the browser.
The Mac does not need to generate the code itself.
Why the codes keep changing
Authenticator applications commonly use time-based one-time passwords. A shared setup secret and the current time are used to generate temporary codes.
The important thing for ordinary users is simple: the code changes automatically, so an old code cannot be treated like a permanent second password.
Google’s current Authenticator documentation also notes that the app uses the operating system’s time settings, and the older manual “time correction” setting is no longer available in version 7.0.
For a reliable google authenticator macbook workflow, therefore, your devices should have automatic date and time settings enabled.
This is especially relevant after:
- traveling between time zones;
- restoring a phone;
- changing system time manually;
- installing a major operating-system update;
- moving authentication accounts to another device.
The concept is simple: your Mac handles the website, while the trusted authenticator handles the temporary credential.
📖 Read More Guides: Google Password Verification: Passwords, 2FA, Passkeys and Authenticator
4. How to Set Up Google Authenticator for a MacBook Login
Step 1: Install Google Authenticator on a trusted mobile device
Because the official application is currently intended for iPhone, iPad, and supported mobile platforms rather than native macOS, begin the google authenticator macbook setup on your trusted phone or tablet.
Download Google Authenticator from the official application store and verify that the publisher is Google.
Then open the application.
Google currently allows Authenticator users to synchronize verification codes by signing in to their Google Account. Google says those synchronized codes are encrypted both in transit and at rest.
You can decide whether synchronization is appropriate for your security model.
Step 2: Enable two-factor authentication on the account
On your MacBook, open the security settings of the account you want to protect.
Look for options such as:
- Two-Factor Authentication
- Two-Step Verification
- Multi-Factor Authentication
- Authenticator App
- Verification App
- TOTP
Select the authenticator option.
The website will usually display either a QR code or a setup key.
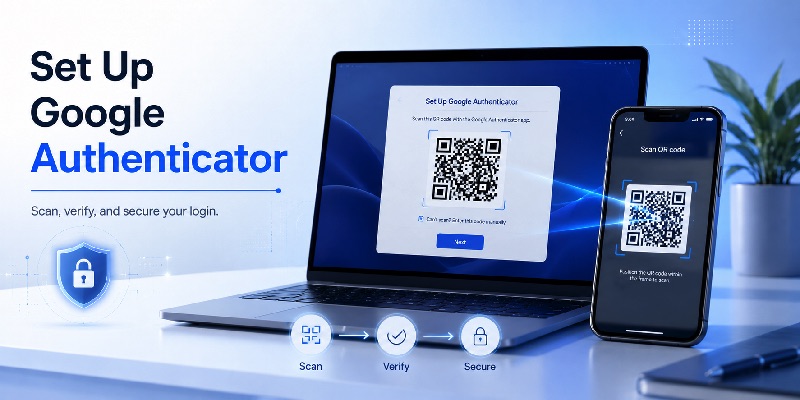
Step 3: Scan the QR code
Keep the QR code visible on the MacBook screen.
Open Google Authenticator on your phone and choose the option to add an account.
Scan the QR code shown on your Mac.
The account should then appear inside Google Authenticator with a temporary verification code.
This is one of the most convenient parts of a google authenticator macbook setup: the large MacBook display makes QR enrollment easy.
Step 4: Confirm the first verification code
Enter the current code from Google Authenticator into the confirmation field displayed on your Mac.
If accepted, two-factor authentication is active.
Do not stop there.
If the website provides recovery codes, save them securely. Google specifically recommends backup codes as another way to sign in when normal 2-Step Verification methods are unavailable.
A strong google authenticator macbook setup should never depend on one phone with no recovery path.
📖 Explore Articles:
Google MFA App: Complete Guide to Secure Multi-Factor Authentication
5. Google Authenticator on MacBook Air vs MacBook Pro
Google Authenticator MacBook Air workflow
There is no meaningful authentication difference between using a google authenticator macbook air setup and using another modern Mac model.
A typical MacBook Air workflow looks like this:
MacBook Air → website → password → authentication request → phone → Google Authenticator code → MacBook Air.
Whether you use Safari, Chrome, Firefox, or another compatible browser normally does not change how a standard authenticator code works.
For students, freelancers, travelers, and remote workers, this setup is especially practical because the phone remains a physically separate authentication device.
That separation can also be useful if your MacBook is shared temporarily for a presentation or connected to an external workstation.
Google Authenticator MacBook Pro workflow
Users searching for google authenticator macbook pro or a google authenticator app for macbook pro often have the same requirement but a heavier professional workflow.
A developer, administrator, designer, marketer, or business user may authenticate repeatedly throughout the day.
For these users, constantly switching between the MacBook Pro and phone can feel slower.
However, there is no separate official google authenticator for macbook pro product. The same Google Authenticator workflow applies.
You have two practical choices:
Security-separated setup
Keep Google Authenticator on a phone while working on your MacBook Pro.
Mac-centered setup
Use a trusted authentication solution that supports verification codes directly on macOS, such as Apple’s built-in Passwords verification-code feature.
The first is generally better when you deliberately want your second factor separated from the computer where you type your password.
The second emphasizes convenience.
So whether you use google authenticator macbook on an Air or Pro is less important than deciding where you want the second factor to live.
6. Three Ways to Get Authentication Codes While Using a Mac
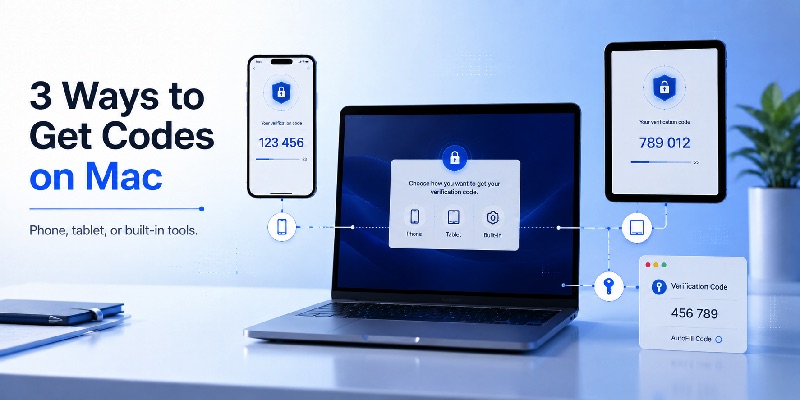
There is no single correct google authenticator macbook configuration. Different users have different priorities.
Here are the three main approaches.
Method A: Google Authenticator on your phone
This is the most direct interpretation of Google’s intended workflow.
Your MacBook handles login while your iPhone or Android device generates the verification code.
Advantages
- Uses the official Google Authenticator application.
- Keeps the second factor on another device.
- Codes can work without an active cellular or network connection.
- Easy to scan QR codes displayed on the Mac.
- Familiar workflow across many websites.
Trade-off
You need your phone whenever authentication is requested.
For most people, this is the google authenticator macbook configuration I would choose first.
Method B: Apple Passwords verification codes on Mac
Mac users who want verification codes directly on their computer have a built-in alternative.
Apple’s Passwords app can store passwords, passkeys, and verification codes. Apple also supports setting up automatic verification codes for websites and apps that use two-factor authentication.
On supported Mac configurations, you can:
- Open the website’s security settings.
- Enable authenticator-based 2FA.
- Request a setup key.
- Open Passwords on the Mac.
- Select the relevant account.
- Choose the verification-code setup option.
- Enter the setup key.
- Use the resulting code to verify enrollment.
Apple also supports automatically filling verification codes on Mac.
This is not Google Authenticator, so it should not be marketed as an official google authenticator app for macbook.
It is simply another compatible way of generating authentication codes.
Method C: A third-party Authenticator App for macOS
A third category is a dedicated third-party Authenticator App that supports macOS.
These apps may provide features such as:
- menu-bar access;
- code search;
- synchronization;
- encrypted backups;
- multiple vaults;
- browser integration.
However, authentication secrets are highly sensitive.
Before using a third-party app as your google authenticator macbook replacement, investigate its developer, privacy practices, storage model, backup encryption, update history, and account-recovery process.
Do not install an app only because its name includes “Google Authenticator.”
📖 Read More Guides: Google Authenticator 2FA: Complete Guide to Two-Step Verification
7. How to Sync, Transfer, and Recover Google Authenticator Codes
Syncing Google Authenticator codes
Modern versions of Google Authenticator can synchronize verification codes through your Google Account.
Google explains that when you sign in to your Google Account inside Authenticator, your verification codes can synchronize across your devices.
This can make a google authenticator macbook workflow easier if you own multiple mobile devices.
For example:
iPhone → Google Account sync → iPad
You can then access your authentication codes from either enrolled mobile device.
Remember that “sync across devices” does not mean the codes automatically appear inside a native Google Authenticator application on macOS.
The official Mac compatibility question remains separate.
Transferring codes manually
Google also provides an account-transfer process.
On the old device, you can use:
Menu → Transfer accounts → Export accounts
Then select the accounts that should be transferred.
On the new device:
Menu → Transfer accounts → Import accounts
Then scan the transfer QR code.
This is useful when changing phones while keeping the same google authenticator macbook workflow.
Do the transfer before erasing or selling the old device.
Recovery deserves its own plan
One of the biggest authentication mistakes is planning for login but not recovery.
Ask yourself:
What happens if my phone disappears tonight?
If the answer is “I cannot access any important account,” your setup needs improvement.
Maintain suitable recovery options such as:
- account backup codes;
- another trusted authentication device;
- passkeys where supported;
- security keys where appropriate;
- verified recovery email or phone methods offered by the service.
Google’s backup-code system is specifically designed to provide another sign-in path when normal second-step methods are unavailable.
A resilient google authenticator macbook setup therefore includes both authentication and recovery.
8. Security Best Practices for Using 2FA on a MacBook

Treat the QR setup code like a password
When setting up google authenticator macbook, the QR code displayed during enrollment is sensitive.
It may contain the secret used to generate future verification codes.
Do not:
- post a screenshot online;
- send the QR code through unsecured chat;
- store it in a public folder;
- include it in screen recordings;
- share it with coworkers unless account policy explicitly requires shared authentication.
Once setup is complete, close the enrollment screen.
Lock both devices properly
If your authentication flow uses both MacBook and phone, secure both devices.
For your Mac:
- use a strong login password;
- enable automatic screen locking;
- keep macOS updated;
- use biometric unlocking where appropriate;
- review installed browser extensions;
- avoid installing unknown security utilities.
For your phone:
- use a device passcode;
- enable Face ID or another biometric lock where available;
- keep the operating system and authenticator app updated;
- avoid leaving the phone unlocked.
The objective of google authenticator macbook is to add a second security barrier, not simply move another credential onto an unprotected device.
Consider the “same-device” trade-off
Storing both your password and your one-time verification codes on the same Mac can be highly convenient.
But convenience and separation are different security goals.
Consider these two layouts:
Separated
Password on MacBook + verification code on phone
Consolidated
Password + verification code both accessible through Mac ecosystem
The separated model means an attacker may need access to more than one device or security boundary.
The consolidated model reduces friction.
Neither decision should be made accidentally.
Choose the google authenticator macbook architecture that matches the sensitivity of your accounts.
For ordinary services, convenience may matter more. For administrator accounts, business systems, developer infrastructure, or valuable online accounts, stronger separation may be worth the extra step.
📖 Explore Articles: What Is Google Authenticator? How It Works, Codes, Setup, and Securit
9. Google Authenticator MacBook Troubleshooting
Problem 1: “I can’t find Google Authenticator in the Mac App Store”
This is currently expected.
The official Google Authenticator App Store compatibility information lists iPhone and iPad rather than a native Mac requirement.
Therefore, do not keep installing similarly named applications expecting them automatically to be Google’s official google authenticator macbook product.
Instead, use the official application on a supported phone or tablet.
Problem 2: The code is rejected
First, wait for a new code and enter it carefully.
If multiple accounts appear in Google Authenticator, verify that you are using the code belonging to the correct website and account.
Also check automatic time settings on your authenticator device. Google’s current documentation says Authenticator relies on the operating system’s time setting.
A rejected code does not necessarily mean your entire google authenticator macbook setup is broken.
Problem 3: I changed phones
If you still have the old device, use Google Authenticator’s transfer function or sign in to the appropriate Google Account if you were using synchronization.
Google’s transfer workflow supports exporting accounts from one device and importing them on another using QR codes.
Do not erase the old device until you have tested the new one.
Problem 4: I lost my phone
Use one of the recovery methods configured with the account.
For a Google Account, backup codes can provide an alternative second step when regular verification is unavailable.
For third-party services, recovery procedures vary.
This is why a google authenticator macbook configuration should be tested before an emergency happens.
Problem 5: I want the verification code directly on my Mac
Use a compatible macOS verification-code solution rather than assuming Google provides a native Mac Authenticator.
Apple Passwords is one built-in option. Apple says the Passwords app can manage passwords, passkeys, and verification codes and can automatically fill verification codes on Mac.
This can provide the convenience users often expect when searching for google authenticator on macbook, while remaining clear that the feature is provided by Apple rather than Google Authenticator.
📖 Explore Articles: Google OTP App: Complete Guide to OTP, TOTP, and 2FA
10. Which Authentication Setup Is Best for MacBook Users?
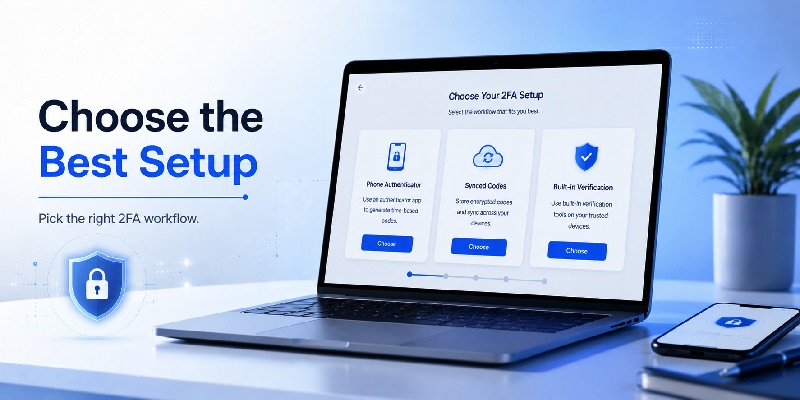
There are several ways to build a secure authentication workflow, but the right choice depends on what you value most.
Choose based on your priority
Use this quick decision map:
Want the official Google application?
→ Use Google Authenticator on your iPhone, iPad, or supported Android device.
Want authentication physically separated from your MacBook?
→ Keep Google Authenticator on your phone.
Want codes available directly on macOS?
→ Consider Apple Passwords verification codes or another carefully evaluated macOS authenticator.
Use a MacBook Pro for professional accounts?
→ The same options apply; there is no separate official google authenticator for macbook pro product.
Use a MacBook Air?
→ The standard phone-plus-Mac workflow works the same way.
Changing phones?
→ Transfer or synchronize your codes before wiping the previous device.
Worried about losing access?
→ Configure backup codes or another recovery factor now.
Final comparison
| Priority | Recommended approach |
| Official Google experience | Google Authenticator on phone |
| Maximum convenience on Mac | Apple Passwords verification codes |
| Separate second factor | Phone + MacBook |
| Apple ecosystem integration | Passwords + iCloud Keychain |
| Multiple mobile devices | Google Authenticator synchronization |
| Custom Mac features | Trusted third-party authenticator |
| Emergency recovery | Backup codes + secondary method |
The key lesson is that google authenticator macbook is best understood as an authentication workflow rather than a specific native Mac application.
Your MacBook is where the login happens.
Google Authenticator can remain on your phone or tablet and generate the temporary second-factor code. Google currently supports synchronization of Authenticator codes through a Google Account, while Apple provides its own verification-code system for users who want authentication integrated more deeply into macOS.
For most users, the straightforward configuration remains:
MacBook + official Google Authenticator on your phone + backup recovery method.
That arrangement is simple, easy to understand, and keeps the second authentication factor separate from the computer used to enter the password.
If your priority is speed, especially when you work all day on a MacBook Air or MacBook Pro, Apple’s verification-code tools can reduce the need to reach for a phone.
Just remember the distinction: an application that generates compatible 2FA codes on macOS is not automatically an official google authenticator app for macbook.
Before installing anything that handles authentication secrets, check who developed it and how those secrets are stored.
Ultimately, the best google authenticator macbook setup is not the one with the fewest clicks. It is the one that gives you an acceptable balance between security, convenience, device separation, synchronization, and recovery.
Configure those pieces correctly, and your MacBook can remain the center of your daily workflow without sacrificing the protection provided by two-factor authentication.
Download Authenticator App
Secure your accounts with fast, reliable two-factor authentication. Download now and protect your login in seconds.