
Sign In Google Authenticator: Complete Setup and Login Guide
Published August 11, 2026 · Updated August 20, 2026
If you are searching for sign in google authenticator, you are probably trying to do one of three things: set up Google Authenticator for the first time, find the verification code required during login, or access your Authenticator codes after changing devices.
The process can initially be confusing because Google Authenticator is not a traditional account login page. Instead, it is an Authenticator App that generates temporary verification codes for accounts protected by two-step verification.
For a Google Account, the usual process is simple: enable two-step verification, connect Google Authenticator, enter your regular Google credentials, and then provide the temporary code when Google requests a second verification step.
Google states that Authenticator can generate one-time verification codes for services that support authenticator-app two-step verification, and those codes can still be generated without an internet connection or mobile service.
This guide focuses specifically on the sign in google authenticator search intent. Instead of covering unrelated features, it walks through setup, QR-code scanning, code generation, login, code synchronization, new-phone migration, and troubleshooting.
1. What Does Sign In Google Authenticator Mean?
The phrase sign in google authenticator can mean two slightly different things, and understanding the difference will make the rest of the process much easier.
Using Authenticator to Sign In to Google
The first meaning is using Google Authenticator as the second verification step when signing in to your Google Account.
A normal login may look like this:
- Enter your Google email address.
- Enter your password or another primary sign-in method.
- Google requests a verification code.
- Open Google Authenticator.
- Find the code associated with your Google Account.
- Enter the current code.
- Complete the login.
This is the most common authenticator google login workflow.
In this situation, you are not using the Authenticator code instead of your entire Google login. The app provides an additional verification factor after two-step verification has been configured.
Signing In to the Google Authenticator App
The second meaning of sign in google authenticator is signing into a Google Account inside the Authenticator app itself.
Google currently allows Authenticator verification codes to be synchronized across devices when you sign in to your Google Account inside Authenticator. Google also provides an option to use Authenticator without a Google Account, in which case codes remain stored on the device rather than being synchronized through the account.
Therefore, you do not always need to login to Google Authenticator app just to generate a verification code.
This distinction is important:
Google Account login: Authenticator helps verify your identity.
Authenticator app sign-in: your Google Account can be used to synchronize stored Authenticator codes across compatible devices.
Download Authenticator App
Secure your accounts with fast, reliable two-factor authentication. Download now and protect your login in seconds.
2. Set Up Google 2FA Before Using Authenticator
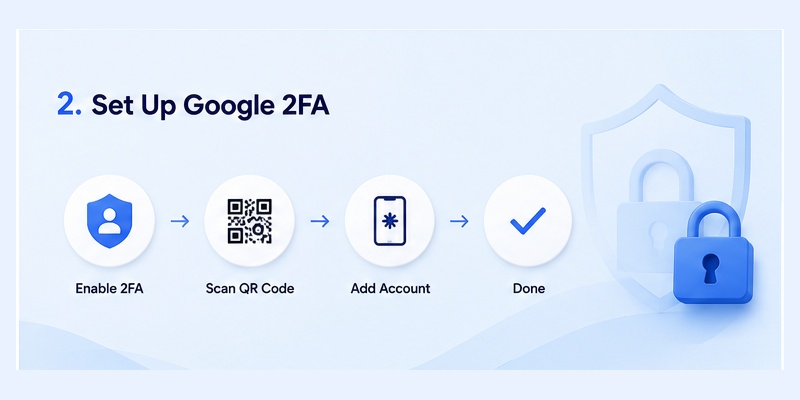
Before you can sign in google authenticator during a Google Account login, you need to configure two-step verification.
Users often search google set up 2fa because Google Authenticator will not automatically generate a usable code for an account until the account has been paired with the application.
Step 1: Open Google Account Security Settings
Sign in to the Google Account you want to protect.
Open the account’s security and sign-in settings and locate the two-step verification section.
You may be required to confirm your identity before changing security settings.
Google’s official guidance explains that Google Authenticator can be configured as a method for generating one-time verification codes after two-step verification is set up.
Step 2: Enable Two-Step Verification
Follow the on-screen instructions to activate two-step verification.
Your account may offer several verification methods. Google Authenticator is useful when you want codes generated directly by an application.
A typical google set up 2fa process may therefore include more than one verification or recovery option.
Do not remove working backup methods simply because you have added Authenticator.
Having an alternative can be valuable if your phone is lost, damaged, or unavailable.
Step 3: Choose Authenticator
Once two-step verification is active, choose the option to configure an authenticator application.
Google will provide the information required to connect the account with Authenticator.
After pairing is complete, the sign in google authenticator flow can be used whenever Google asks for that second verification method.
📖 Read More Guides:
Google Authenticator 2FA: Complete Guide to Two-Step Verification
3. How to Set Up Google Authenticator Step by Step
For users searching how to set up google authenticator, the most important part is correctly linking the application to the account.
A proper google authenticator app set up normally takes only a few minutes.
Step 1: Install Google Authenticator
Install Google Authenticator on the phone you intend to use for verification.
Open the app.
Depending on your configuration, you may choose to use your Google Account for synchronized codes or use Authenticator without an account.
Step 2: Open Authenticator Setup in Google
Return to your Google Account’s two-step verification settings.
Choose the Authenticator setup option.
Google’s current instructions describe going to the account’s two-step verification settings, selecting the Authenticator setup option, and following the on-screen steps.
Step 3: Scan the QR Code
Google will typically present setup information that can be scanned by the Authenticator App.
Open the option for adding an account in Authenticator and scan the displayed QR code.
Once the scan succeeds, a new entry should appear inside the app.
It will begin displaying temporary verification codes.
Step 4: Verify the First Code
The website may ask you to enter a code generated by Authenticator.
Enter the current code before it expires.
If it is accepted, your google authenticator app set up is complete.
You can now use sign in google authenticator as part of your Google Account’s two-step verification process.
Step 5: Prepare a Backup Method
Do this before you actually need it.
Google provides backup codes that can be used as a second step when normal two-step verification is unavailable. Each backup code is intended for one-time use.
Keep those codes somewhere secure.
Do not rely entirely on one phone for access to an important Google Account.
📖 Explore Articles: Google Authenticator: Complete 2FA Setup & Security Guide
4. How to Get a Google Authenticator Code and Sign In
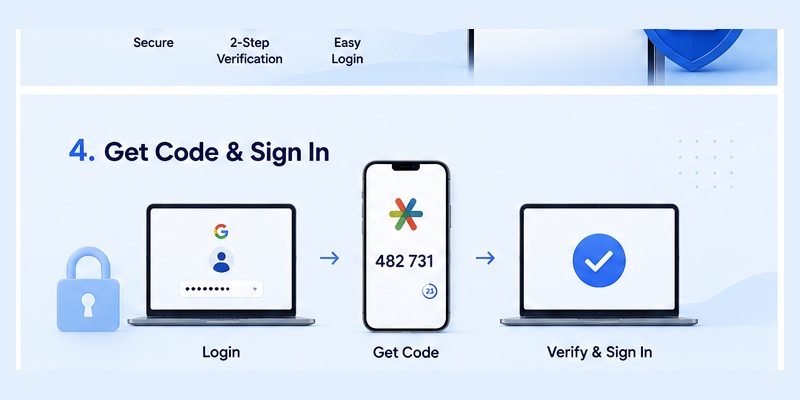
After setup, the actual sign in google authenticator process is straightforward.
The most common question at this stage is how to get google authenticator code during login.
Step 1: Start Your Google Login
Go to the Google service you want to use.
Enter your Google Account details and complete the normal first authentication step.
If your account is configured to request an Authenticator code, Google will display a second verification screen.
Step 2: Open Google Authenticator
Open the Authenticator App on your phone.
Locate the entry corresponding to the Google Account you are trying to access.
A temporary code will be displayed.
You do not need to request this code by text message. Authenticator generates it on the device.
Google confirms that Authenticator codes can be generated even without an internet connection or mobile service.
This is the key answer to how to get google authenticator code: open the configured account entry and use the currently displayed verification code.
Step 3: Enter the Current Code
Return to the Google login screen.
Enter the code exactly as displayed.
Complete the verification before the code changes.
If the timer is nearly finished, waiting for the next code can make the process easier.
Step 4: Complete the Login
After Google accepts the verification code, the sign in google authenticator process is complete.
You can continue to Gmail, Drive, YouTube, Calendar, or the Google service you were opening.
The important sequence is:
Account → primary sign-in → Authenticator code → account access
That is the standard authenticator google login flow.
📖 Explore Articles: Google Authenticator: Complete 2FA Setup & Security Guide
5. How to Login to Google Authenticator App and Sync Codes
The phrase login to google authenticator app can cause confusion because Authenticator can work differently from a normal email or social app.
You do not necessarily have to create a separate Authenticator username and password just to generate codes.
Signing In for Code Synchronization
Google currently lets users synchronize Authenticator verification codes across devices by signing in to a Google Account within the app. Google says these synchronized codes are encrypted in transit and at rest across its products.
This can make sign in google authenticator more convenient when you change devices.
If your codes are synchronized through your Google Account, you may have an easier path to accessing them on another compatible device after signing in.
Using Authenticator Without Account Sync
Google also allows users to use Authenticator without signing in to a Google Account.
In this configuration, the codes are stored on the device rather than synchronized through your Google Account.
Therefore, when someone asks how to login to google authenticator app, the correct answer depends on the goal.
If you only need a verification code and Authenticator is already configured, simply open the app.
If you want account-based synchronization across devices, sign in using the Google Account option available in Authenticator.
This distinction prevents a common misunderstanding around the sign in google authenticator process
📖 Read More Guides: Google Authenticator Support: Setup, Supported Apps and Troubleshooting Guide
6. Sign In Google Authenticator on a New Phone
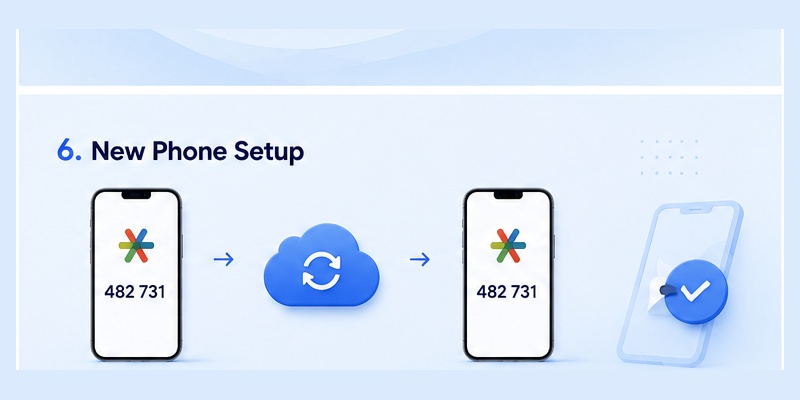
A new phone is one of the most common situations in which sign in google authenticator becomes confusing.
The safest approach is to prepare before erasing or losing access to the old phone.
If Your Codes Are Synchronized
If you previously enabled Google Account synchronization for Authenticator, signing into the corresponding Google Account in Authenticator can allow supported synchronized codes to appear across devices.
After signing in, verify that the accounts you need are present.
Do not assume the migration succeeded until you test an actual login.
If You Use Authenticator Without an Account
If your codes are stored only on the device, use the available transfer process while you still have the old phone.
Google’s Authenticator guidance includes account-transfer functionality for moving codes between devices.
The basic goal is to move your Authenticator accounts before resetting the original device.
Test Before Erasing the Old Device
After transferring your accounts:
- Open Google Authenticator on the new phone.
- Confirm that the Google Account entry appears.
- Start a Google login.
- Use the code generated by the new phone.
- Confirm that Google accepts it.
Only after this sign in google authenticator test succeeds should you consider removing access from the old device.
For important accounts, also verify that backup codes or another recovery option remain available.
📖 Explore Articles: What Is Google Authenticator? How It Works, Codes, Setup, and Securit
7. Fix Sign In Google Authenticator Problems
If sign in google authenticator does not work, identify which stage is failing.
There is a major difference between an incorrect password, a missing Authenticator account, and a verification code that is rejected.
Problem 1: No Google Authenticator Code Appears
If you open the app but cannot find your Google Account, the account may not have been configured on that device.
Check whether you are using synchronized Authenticator codes or device-only storage.
If you recently changed phones, you may need to complete the transfer or sign in to the Google Account used for Authenticator synchronization.
Problem 2: The Code Is Rejected
Confirm that you selected the correct Authenticator entry.
If you manage several Google Accounts, codes can easily be confused.
Also check the phone’s system time. Google’s current Authenticator documentation notes that the app uses the operating system’s time settings.
Use automatic date and time when appropriate.
If a code is about to expire, wait for the next one and try again.
Problem 3: You Lost the Phone
If the phone containing Authenticator is unavailable, try another configured verification method.
Google provides backup codes specifically for cases where users cannot access their normal two-step verification method, such as after losing a phone or being unable to receive Authenticator codes.
On the sign-in screen, look for an option such as Try another way and use an available recovery method.
Problem 4: You Cannot Use Any Second Step
If no normal second-step method is available, Google’s troubleshooting guidance recommends using a trusted device where possible and proceeding through account recovery. Work or school users may also need to contact their administrator.
Avoid repeatedly guessing verification codes.
A sign in google authenticator failure caused by lost access will not be solved by entering random six-digit numbers.
📖 Explore Articles: Google OTP App: Complete Guide to OTP, TOTP, and 2FA
8. Sign In Google Authenticator Safely: Final Checklist
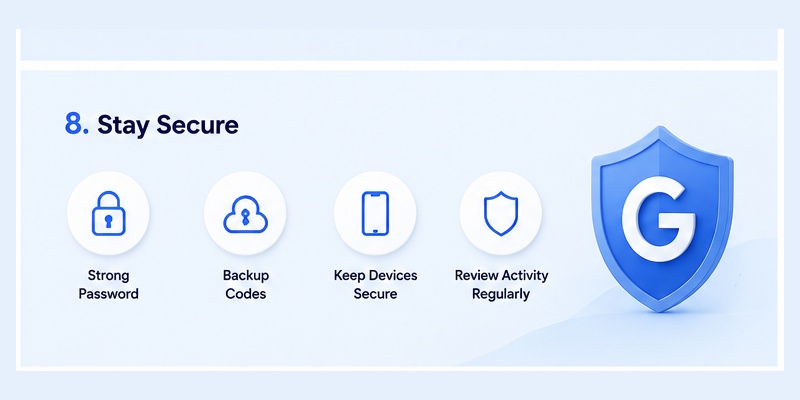
Once setup is complete, the sign in google authenticator process should become routine.
The key is to configure everything correctly before relying on Authenticator as an important security method.
Your Setup Checklist
Before finishing, confirm that:
- Two-step verification is enabled.
- Google Authenticator is connected to the correct Google Account.
- The app generates a verification code.
- Google accepts that code during login.
- You know how to get google authenticator code when prompted.
- You understand whether your Authenticator codes are synchronized or stored only on your device.
- You have a backup sign-in option.
- Recovery codes are stored securely.
This checklist covers the most important parts of how to set up google authenticator for everyday use.
Never Share Authenticator Codes
A Google Authenticator code is temporary, but it is still sensitive.
Do not send a verification code to someone who contacts you unexpectedly.
If you receive an authentication request you did not initiate, review your account security rather than completing the login.
Keep Recovery Methods Ready
The best time to prepare for account recovery is before you lose your device.
Google provides backup codes as an alternative second step, and other verification methods may also be available depending on the account configuration.
This makes future sign in google authenticator problems much easier to manage.
📖 Explore Articles: Google Authenticator App Store: Download, Setup & Best App
Final Takeaway
The main thing to remember is that Google Authenticator performs a specific job: it generates temporary verification codes used as part of two-step verification.
To sign in google authenticator successfully, first configure two-step verification, connect the Authenticator App, start your normal Google login, open Authenticator when asked for a code, and enter the current code.
You can also sign in to a Google Account within the Authenticator app to synchronize supported verification codes across devices, but Google Authenticator can also be used without Google Account synchronization.
For users whose main goal is authenticator google login, there is no need to complicate the process with unrelated features.
The workflow is simply:
Set up 2FA → connect Google Authenticator → open Google login → get the current Authenticator code → enter the code → sign in.
Once those steps are correctly configured, sign in google authenticator provides a practical additional security layer while remaining simple enough for everyday Google Account access.
Download Authenticator App
Secure your accounts with fast, reliable two-factor authentication. Download now and protect your login in seconds.