
Setting Up Google Authenticator: Complete 2FA Setup Guide
Published August 8, 2026 · Updated August 14, 2026
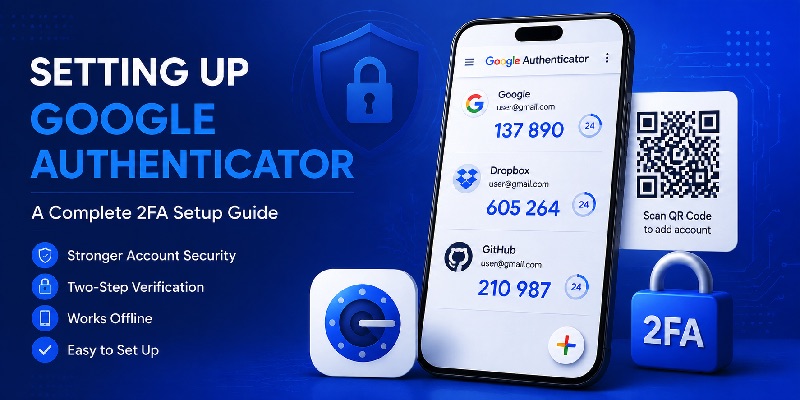
If you want to improve account security, setting up google authenticator is one of the easiest ways to add an additional verification layer to your login process. Google Authenticator generates temporary verification codes that can be used with Google Accounts as well as many websites and applications that support two-factor authentication.
One of its biggest advantages is that verification codes can still be generated when your phone does not have an internet connection or mobile service. This makes Google Authenticator useful when traveling, changing SIM cards, or using an account in places with weak cellular coverage.
However, setting up google authenticator correctly involves more than simply downloading the app and scanning a QR code. A complete setup should also include backup verification methods, recovery options, login testing, device transfer planning, and basic security precautions.
This guide explains the entire process step by step, including how to configure Google Authenticator, transfer accounts to another phone, reset the setup, and troubleshoot common problems.
1. What Is Setting Up Google Authenticator?
How Google Authenticator Works
When setting up google authenticator for an account, the service normally gives you a QR code or setup key. After you add this information to Google Authenticator, the app begins generating temporary verification codes for that specific account.
During a typical login process, you first enter your username and password. If two-factor authentication is enabled, the website may then ask for the current code displayed in Google Authenticator.
These codes change regularly, which means an old code will no longer work after it expires. Because the code is generated directly on your device, you do not need to wait for an SMS message or email.
Google Authenticator can work with many services that support time-based one-time passwords. Therefore, setting up google authenticator can help you manage authentication codes for Google Accounts, social platforms, productivity tools, cloud services, and many other compatible accounts from one application.
Does Google Authenticator Replace Your Password?
No. In a traditional 2FA setup, Google Authenticator normally works as an additional authentication factor rather than replacing your password.
Your password remains the first layer of protection, while the Authenticator code becomes the second layer. Even if someone discovers your password, they may still be unable to access the account without the verification method connected to your device.
When checking google verification settings, you may also notice other security options. Depending on your account, these can include passkeys, security keys, prompts, recovery methods, and backup codes.
For stronger protection, avoid relying on only one verification method. Keeping at least one secure backup option can prevent you from losing account access if your phone is damaged, lost, or replaced.
Download Authenticator App
Secure your accounts with fast, reliable two-factor authentication. Download now and protect your login in seconds.
📖 Explore Articles: Google Authenticator: Complete 2FA Setup & Security Guide
2. What to Prepare Before Setting Up Google Authenticator
Prepare Your Phone and Account
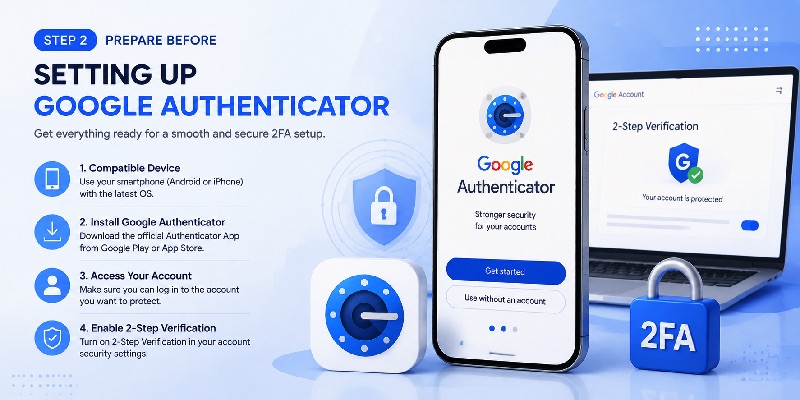
Before setting up google authenticator, make sure you have access to the account you want to protect and a compatible Android phone or iPhone.
You should also have access to the account’s security settings through a web browser or the service’s mobile application.
Install the latest available version of Google Authenticator from the official application store for your operating system. Keeping the application updated helps ensure you have access to the latest account synchronization and transfer features.
Google Authenticator can also synchronize authentication codes with a Google Account. If you choose this option, your saved codes may be available on another device after signing in with the same Google Account.
Alternatively, you can use Google Authenticator without signing in. In this case, codes remain stored locally on the device, making it especially important to transfer them before resetting or replacing your phone.
Enable 2-Step Verification First
For a Google Account, you generally need to enable two-step authentication before completing setting up google authenticator.
Open your Google Account and navigate to the security section. Look for the area related to how you sign in to Google and open 2-Step Verification.
You may need to enter your password or confirm your identity before changing security settings.
Users searching for google two step verification settings should focus on the Security or Security & sign-in area of their Google Account. Google’s interface can change over time, so the exact position or wording of buttons may differ depending on your device or account.
Once 2-Step Verification is enabled, you can continue adding Google Authenticator as one of your verification methods.
📖 Read More Guides: Google Authenticator 2FA: Complete Guide to Two-Step Verification
3. How to Set Up Google Authenticator for a Google Account
Step 1: Open the Authenticator Setup
Start setting up google authenticator by signing in to the Google Account you want to protect.
Go to your account’s security settings and open 2-Step Verification. Google may ask you to verify your identity again before allowing security changes.
Look for the Authenticator option and select the setup option displayed on your screen.
Depending on the device, interface version, and account configuration, the wording may vary. You might see options such as “Set up authenticator” or “Get started.”
If you search for 2fa settings google authenticator and the current interface does not exactly match screenshots from older tutorials, this does not necessarily mean something is wrong. Google periodically changes menu layouts and security interfaces.
Step 2: Open Google Authenticator
Install and open the Authenticator App on your phone.
When setting up google authenticator, you may have the option to sign in using a Google Account. Doing so can make transferring codes to another device easier because compatible authentication codes can be synchronized.
You may also choose to use Google Authenticator without a Google Account.
This option can be useful for users who prefer local-only storage, but you will need to manage account transfers manually if you later replace the device.
Before continuing, decide which approach is more suitable for your security and recovery preferences.
Step 3: Get the QR Code
The service will normally display a QR code during setting up google authenticator.
This QR code contains the information Google Authenticator needs to generate verification codes for your account.
Some services may also provide a manual setup key. This can be useful if your phone camera cannot scan the QR code.
Do not share the QR code or setup key with another person. Anyone who obtains the setup information may potentially be able to generate valid authentication codes for that account.
If you believe your QR code or setup key has been exposed, remove or replace that Authenticator configuration from your account’s security settings and perform the setup again.
4. Scan the QR Code and Verify Your Authenticator Code
Scan the Correct QR Code
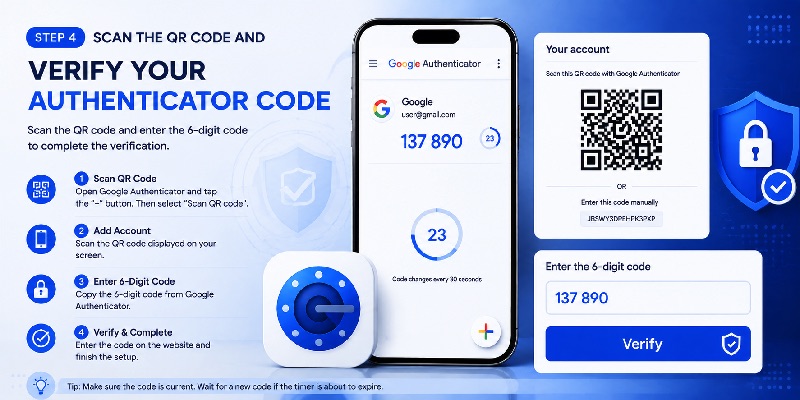
Open Google Authenticator and select the option to add a new code.
Scan the QR code displayed by the website or account security page. After scanning it, a new account entry should appear inside the Authenticator application.
Once setting up google authenticator reaches this stage, you should see the account name together with a temporary verification code.
If you have multiple accounts in Google Authenticator, always check the account name before entering a code. Using the code belonging to another account is one of the simplest reasons authentication attempts fail.
You should also avoid submitting a code when it is about to expire. If only a small amount of time remains, wait for the next code and enter the new one instead.
Complete Verification
After scanning the QR code, the website will normally ask you to enter the verification code currently displayed in Google Authenticator.
Enter the code and submit it.
If the code is accepted, setting up google authenticator should be complete for that account.
Do not immediately close every active login session. A safer approach is to keep your current authenticated session open while testing the new method in another browser or private browsing window.
This allows you to confirm that Authenticator works correctly while still having access to the account’s security settings if something needs to be changed.
For Google Accounts, keep in mind that a newly configured Authenticator may not always become an immediately available sign-in method in every situation. Security protections can affect when a newly added method becomes trusted.
📖 Explore Articles: Google OTP App: Complete Guide to OTP, TOTP, and 2FA
5. Check Google 2FA Settings and Backup Methods
Review Your Verification Methods
After setting up google authenticator, return to your account’s two-step authentication settings.
Review all available verification methods and confirm that the new Authenticator option is configured correctly.
This is also a good time to review 2fa settings google and remove devices or recovery methods you no longer control.
For example, if an old phone number, previous smartphone, or outdated recovery option is still connected to the account, determine whether it should remain there.
Do not remove every backup method simply because Authenticator is working. Having at least one alternative recovery method can be extremely useful if your phone stops working.
Create Backup Codes
Backup codes are an important addition after setting up google authenticator.
For Google Accounts, backup codes can be generated from the 2-Step Verification settings. They are designed to provide another way to verify your identity when your normal second factor is unavailable.
Store these codes somewhere secure and separate from the phone containing Google Authenticator.
For example, if both your phone and backup information are stored only on the same device, losing that device could make recovery much more difficult.
Treat backup codes like passwords. Do not post them online, send them through public chats, or share screenshots containing them.
If you generate a new set of backup codes, previous codes may become invalid, so always make sure you know which set is currently active.
6. Setting Up Google Authenticator for Other Websites and Apps
General Setup Process
Setting up google authenticator is not limited to Google Accounts.
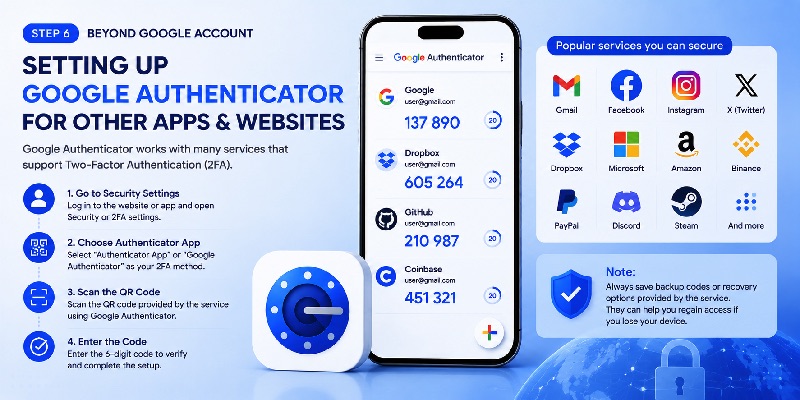
Many websites and applications support Authenticator-based 2FA. The exact interface differs between services, but the overall process is usually similar.
First, log in to the website or application you want to protect.
Open its account or security settings and look for options such as:
Two-Factor Authentication
2-Step Verification
Multi-Factor Authentication
Login Security
Authenticator App
Select the Authenticator option and follow the instructions provided by the service.
Usually, you will receive a QR code. Scan it using Google Authenticator and enter the generated code back into the website to confirm the connection.
If you searched for cara setting google authenticator, the term essentially refers to instructions for configuring Google Authenticator. Regardless of language, always prioritize the setup instructions provided by the specific service you are protecting.
Google Authenticator and Third-Party Recovery
An important detail about setting up google authenticator for third-party websites is that Google does not control those services’ account recovery systems.
Google Authenticator generates the code, but the website decides how authentication, backup codes, and account recovery work.
Therefore, whenever you add a new account to Authenticator, check whether that service provides recovery codes or another backup verification method.
Save those recovery options securely.
If you later lose access to your phone and do not have synchronized or transferred Authenticator codes, you may need to use the individual service’s account recovery process.
📖 Explore Articles: FIDO Google: Complete Guide to Secure Login and FIDO2
7. Transfer Google Authenticator to a New Phone
Transfer Using Google Account Synchronization
Modern versions of Google Authenticator can synchronize compatible codes through your Google Account.
This can make setting up google authenticator on a replacement phone much easier.
Install Google Authenticator on the new phone and sign in using the same Google Account you previously used for synchronization.
If your Authenticator codes were synchronized, they should become available on the new device after your account data is loaded.
However, do not immediately erase your old phone.
First, open several important accounts and confirm that the codes displayed on the new device are working correctly.
Only after verifying your accounts should you reset, sell, or dispose of the previous device.
Transfer Accounts Manually
If you use Google Authenticator without account synchronization, you can still transfer accounts manually if you have access to the old phone.
On the old device, open Google Authenticator and find the Transfer accounts option.
Choose Export accounts and select the accounts you want to move.
The application will generate one or more QR codes.
On the new phone, install Google Authenticator and select:
Transfer accounts > Import accounts.
Then scan the QR codes displayed on the old device.
If several QR codes are generated, scan all of them.
After the transfer, check that the expected accounts appear on the new phone. Test important logins before removing Authenticator data from the previous device.
This approach makes setting up google authenticator on a replacement phone possible without manually configuring every service again.
8. Resetting Google Authenticator After Losing or Changing a Phone
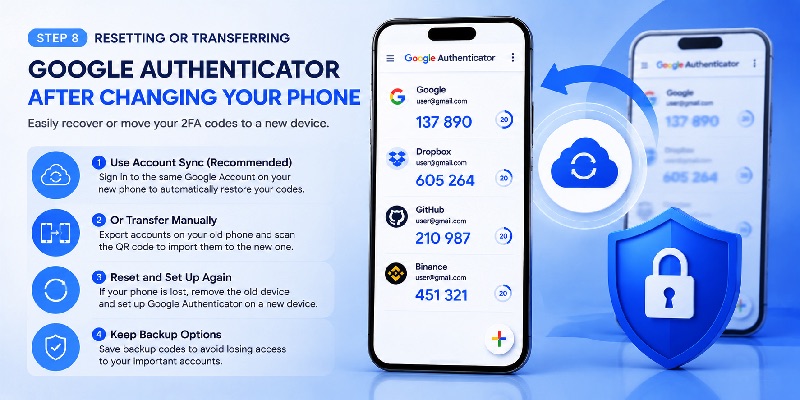
Reset When You Still Have Account Access
Resetting google authenticator is usually easier when you can still access the account through another verified session or backup authentication method.
Open the security settings of the service and locate its 2FA configuration.
Depending on the platform, you may be able to remove, replace, or reconfigure the existing Authenticator connection.
After removing the old configuration, complete setting up google authenticator again using your new device.
Do not remove the old Authenticator method unless you are confident that you can continue accessing the account.
For important accounts, maintain an active browser session until the replacement setup has been tested successfully.
What to Do If Your Phone Is Lost
If your phone is lost or stolen, your first priority should be protecting access to both the device and your accounts.
Use the device security or remote management tools available for Android or iOS when appropriate.
If your Authenticator codes were synchronized with a Google Account, installing Google Authenticator on a new device and signing in may restore synchronized entries.
If your codes were stored only locally, recovery may require more work.
You may need to sign in using backup codes or another verification method, remove the old Authenticator configuration, and complete setting up google authenticator again.
For third-party services, follow the recovery procedure provided by each service.
This is why having backup verification methods before losing a device is significantly easier than attempting recovery afterward.
9. Troubleshooting Problems After Setting Up Google Authenticator
Authenticator Code Keeps Failing
One of the most common problems after setting up google authenticator is receiving an invalid code message.
First, confirm that you are entering the code for the correct account.
If several accounts have similar email addresses or names, it is easy to choose the wrong entry.
Next, wait for a completely new code and try again.
Also check your phone’s date, time, and time zone settings. Using automatic date and time settings can help prevent problems caused by incorrect system time.
If you recently replaced or reconfigured Authenticator, make sure you are not accidentally using codes from an older account configuration that is still visible in the app.
Avoid repeatedly removing and adding the account before identifying the cause because multiple similar entries can make troubleshooting more confusing.
Authenticator Codes Are Missing
If codes disappear after setting up google authenticator, first check whether you are signed in to the expected Google Account inside the Authenticator application.
If you use multiple Google Accounts, your codes may be synchronized under a different account.
You should also determine whether you previously selected an option that stores Authenticator codes without signing in.
In that case, the entries may have existed only on your previous device.
If you changed phones without synchronization or manual transfer, you may need to restore access through the individual websites’ backup or recovery systems.
For managed business or school accounts, administrators may control which authentication methods are available. If an expected option is missing, organizational policy may be the reason.
10. Security Tips and FAQ About Setting Up Google Authenticator
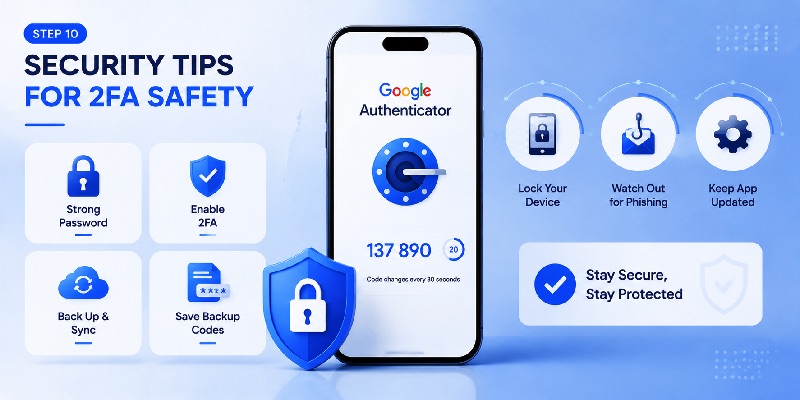
Security Tips to Follow
Completing setting up google authenticator is an important security improvement, but you should also protect the Authenticator application itself.
Where available, enable additional screen protection so that someone who gains temporary access to your unlocked phone cannot immediately view authentication codes.
Keep your phone protected with a secure PIN, password, fingerprint, or other appropriate device lock.
Do not share screenshots of your Authenticator screen.
Similarly, never share setup QR codes, manual setup keys, or recovery codes.
Regularly review your account security settings and remove devices you no longer own or use.
If you use synchronization, confirm which Google Account contains your Authenticator information.
If you use local-only storage, remember to transfer your accounts before replacing or resetting the phone.
Successful setting up google authenticator should always include a recovery plan.
Frequently Asked Questions
Does Google Authenticator need an internet connection?
Google Authenticator can generate verification codes without an active internet or mobile connection. However, features such as account synchronization require connectivity.
Can I use Google Authenticator without signing in to a Google Account?
Yes. Google Authenticator can be used without account synchronization. In this configuration, codes remain stored locally on the device.
Do I need to manually add every account after changing phones?
Not necessarily. If your codes are synchronized with a Google Account, they may appear after you sign in on your new device.
If synchronization is disabled but you still have your old phone, you can use the account transfer feature to export and import your codes.
Should I reset my old phone before transferring Authenticator?
No. Complete setting up google authenticator on the new device first.
Confirm that important authentication codes work before erasing your previous phone.
Why does my Google security page look different from tutorials online?
Google regularly updates its interface. Menu names and locations can differ depending on the operating system, account type, device, and current interface version.
Instead of relying exclusively on screenshots from older tutorials, look for sections related to Security, how you sign in, and 2-Step Verification.
What is setting Google Authenticator correctly?
The phrase setting google authenticator generally refers to connecting an account with the Authenticator application through a QR code or setup key and then verifying a generated code.
A complete setup should also include recovery and backup methods.
What should I check in Google 2FA settings?
Review your Authenticator configuration, registered devices, recovery information, backup methods, and any other available authentication methods.
Keeping your security information current reduces the risk of account lockout.
Can I use more than one authentication method?
Yes, and having an additional secure verification or recovery method can be useful if your Authenticator device becomes unavailable.
What should I do before replacing my phone?
Before replacing your phone, check whether your Authenticator codes are synchronized. If they are not, use the account transfer feature while you still have access to the old device.
Then test your most important accounts on the new device.
Is setting up Google Authenticator enough to protect an account?
Setting up google authenticator provides an important extra security layer, but it should be combined with a strong password, secure recovery information, careful device management, and awareness of phishing attempts.
In conclusion, setting up google authenticator is relatively simple when you follow the correct order. Enable two-step verification, connect Google Authenticator, scan the provided QR code, confirm the generated code, and then configure at least one reliable backup method.
If you plan to change phones, transfer or synchronize your codes before erasing the old device. If your phone has already been lost, secure your accounts first and use the available recovery methods to reconnect Authenticator.
A well-planned setting up google authenticator process does more than activate 2FA. It gives you a practical security system that remains manageable when you travel, change devices, experience technical problems, or need to recover account access.
Download Authenticator App
Secure your accounts with fast, reliable two-factor authentication. Download now and protect your login in seconds.