How to enable 2FA for your Microsoft account
Updated June 5, 2026

A step-by-step guide on how to set up two-factor authentication (2FA) for your Microsoft account using Authenticator App. With 2FA enabled, signing in requires both your password and a temporary verification code — keeping your account safe even if your password is stolen.
Download Authenticator App
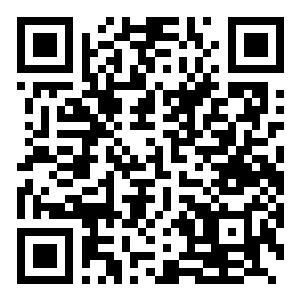
First, download the Authenticator ℠ App on your Apple device. Click the button below or scan the QR code with your iPhone camera.
Get the Authenticator ℠ App
Scan the QR codes from Microsoft and generate secure one-time codes.

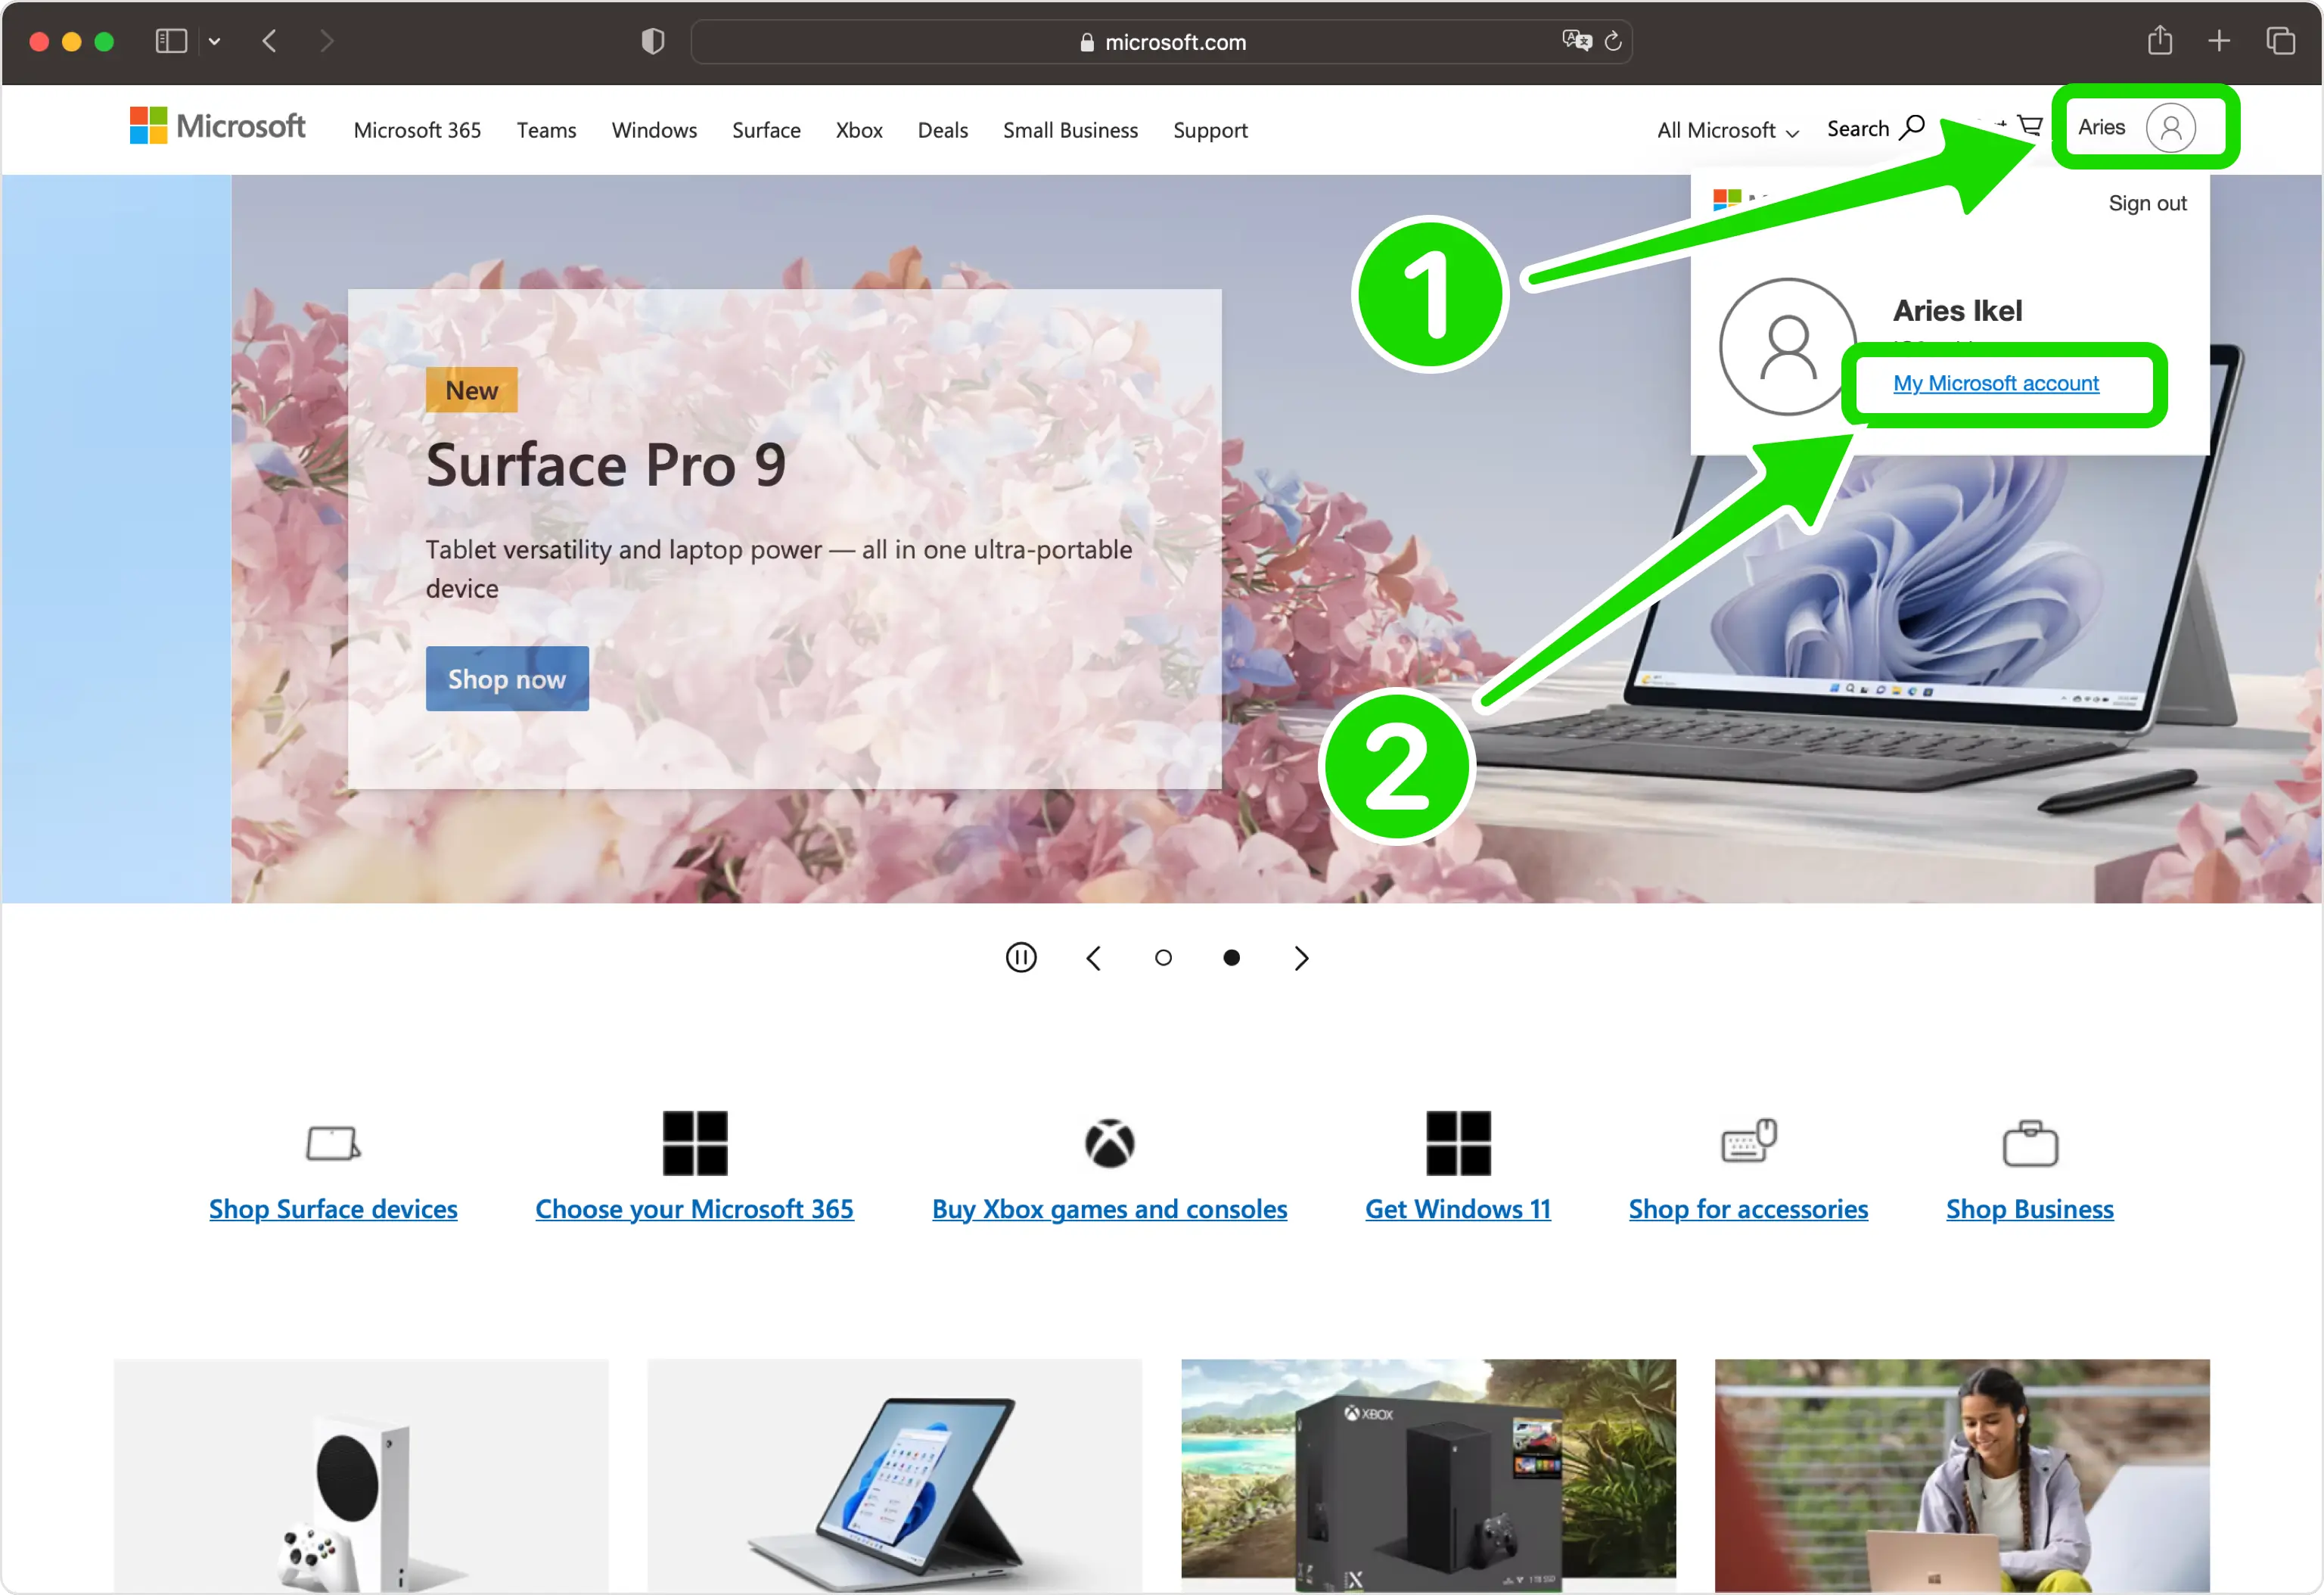
Open your Microsoft account menu
Sign in to your Microsoft account, click your account icon in the top-right corner, and choose My Microsoft account from the drop-down.
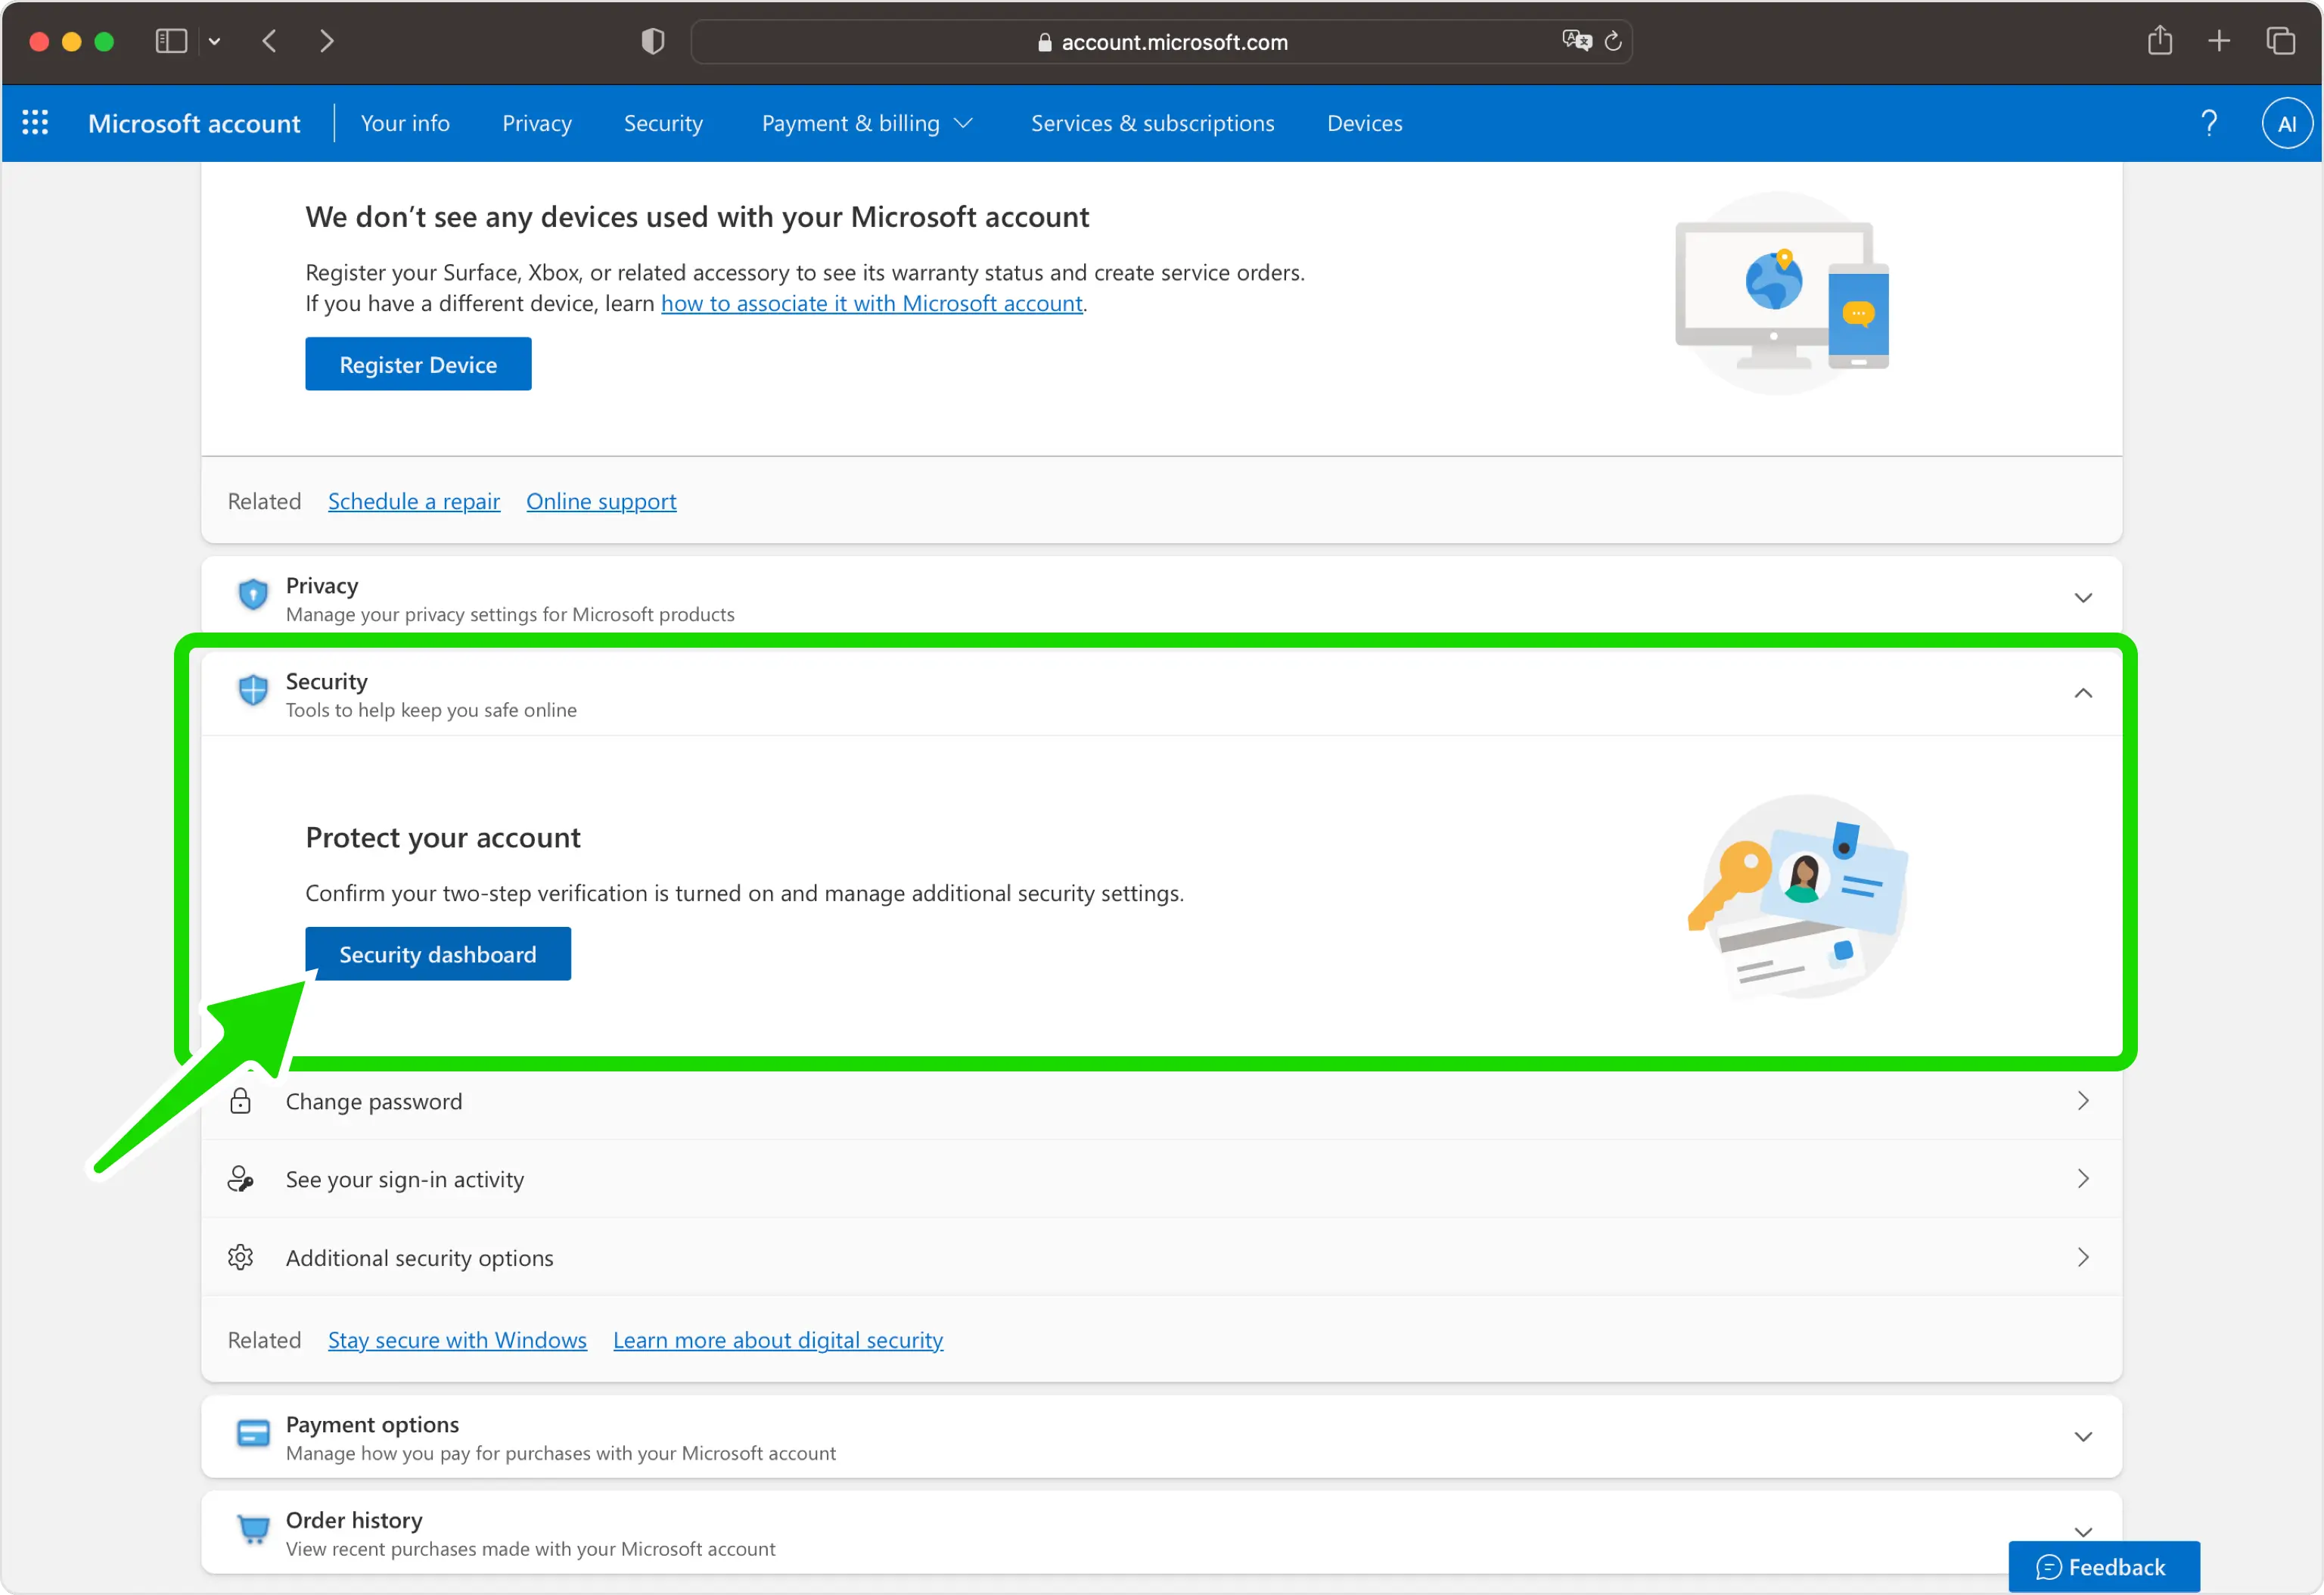
Go to the Security dashboard
Find the Security section of your account page and click the Security dashboard button to open your security settings.
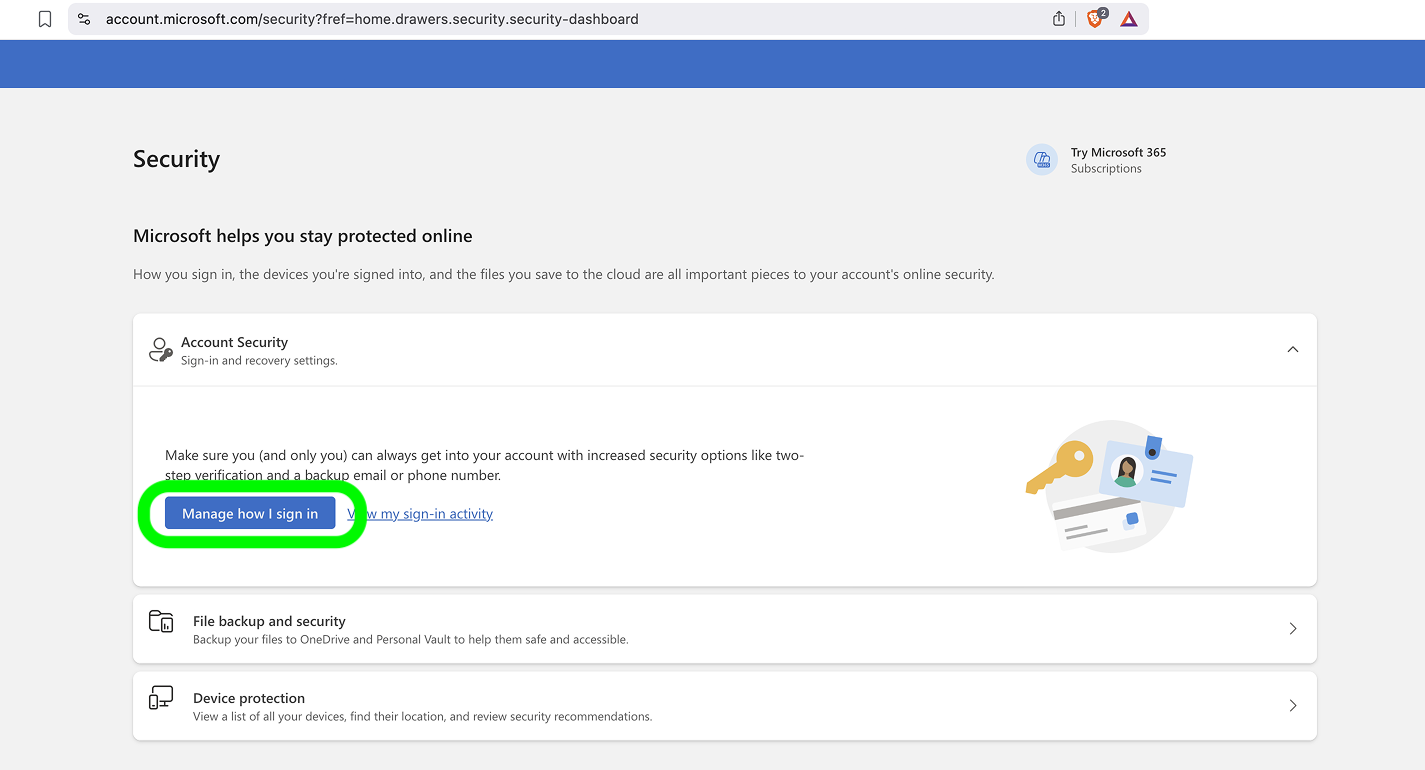
Open "Manage how I sign in"
Under Account security, click Manage how I sign in to see all the ways you can verify your identity.
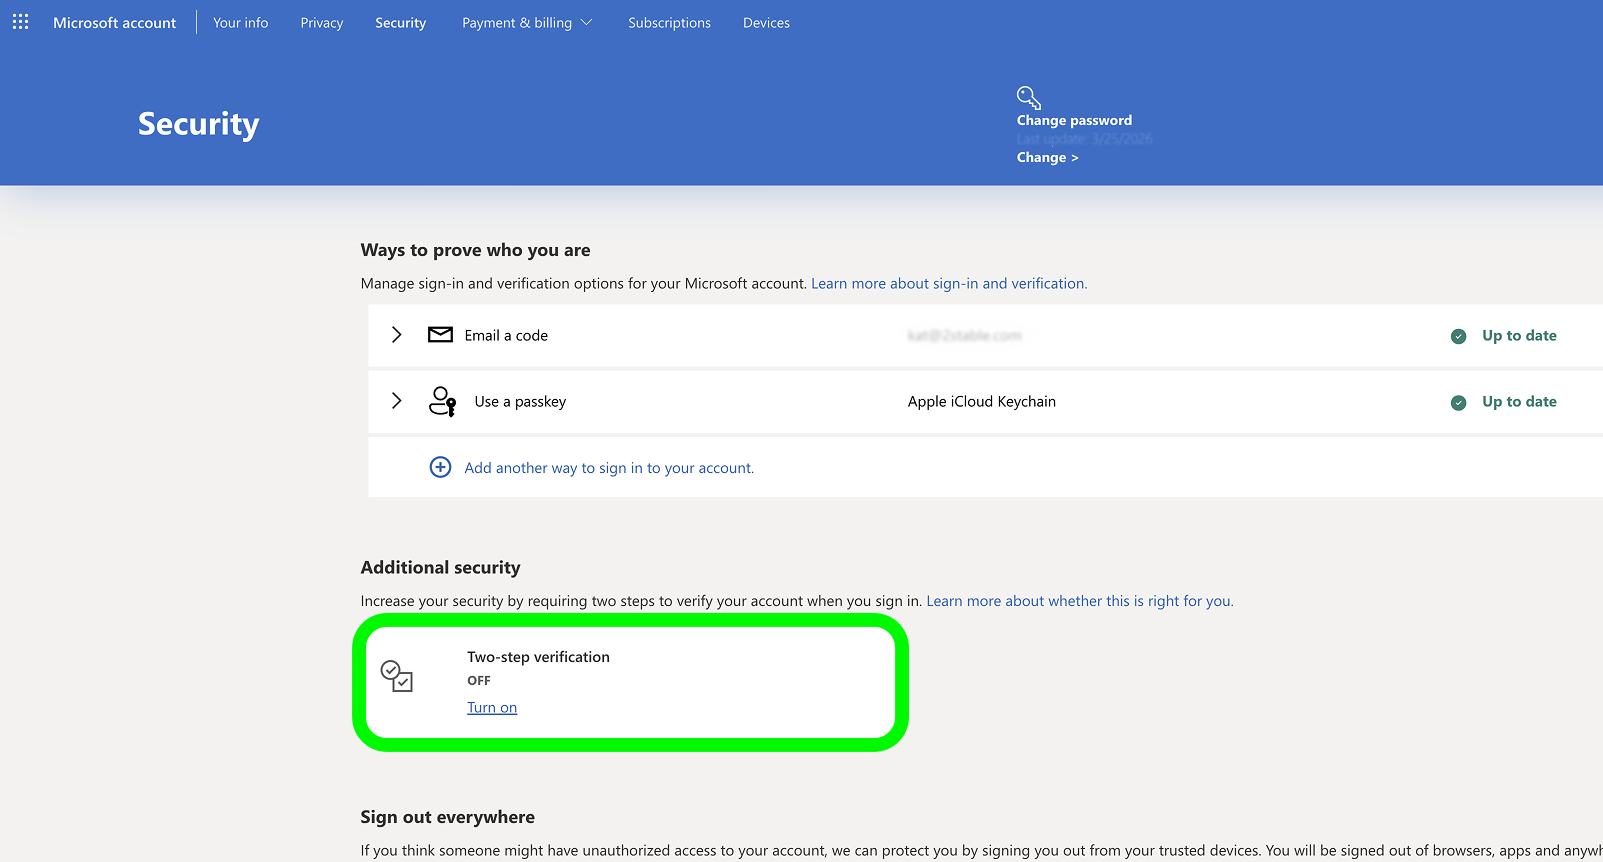
Turn on Two-step verification
In the Additional security section, find Two-step verification and click the Turn on link to start setup.
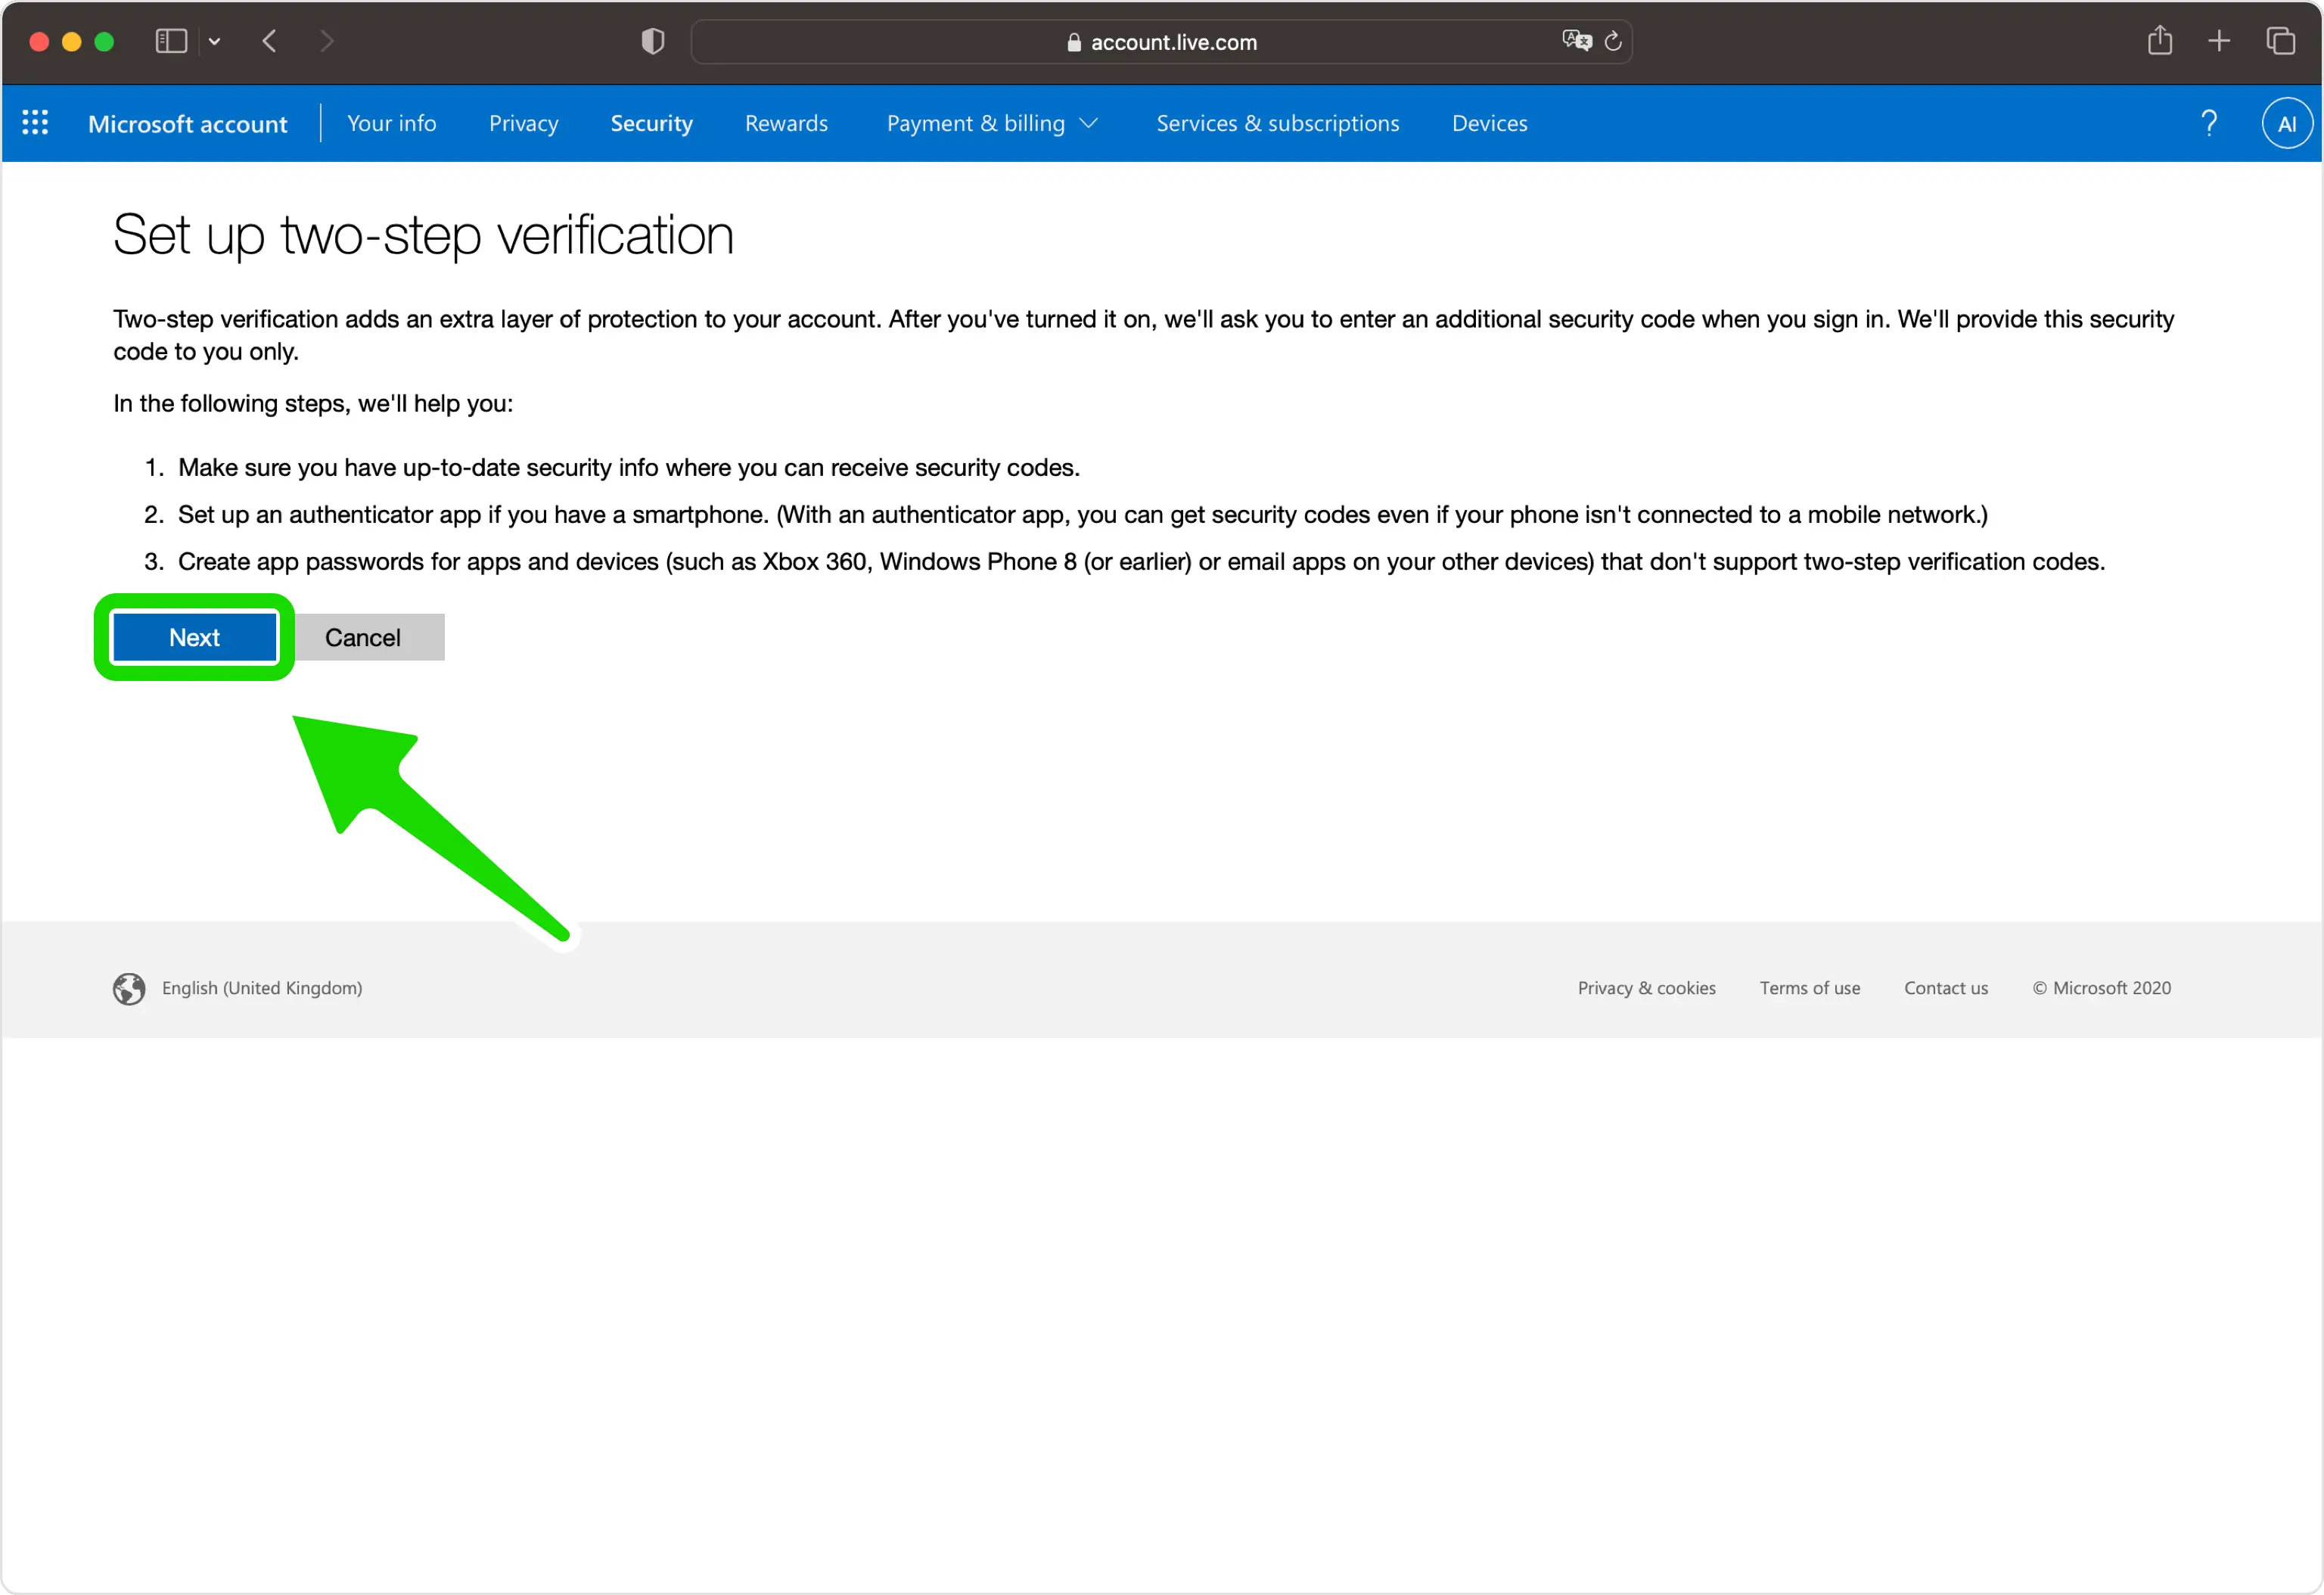
Begin Two-step verification setup
Read the intro screen and click Next to continue through the setup wizard.
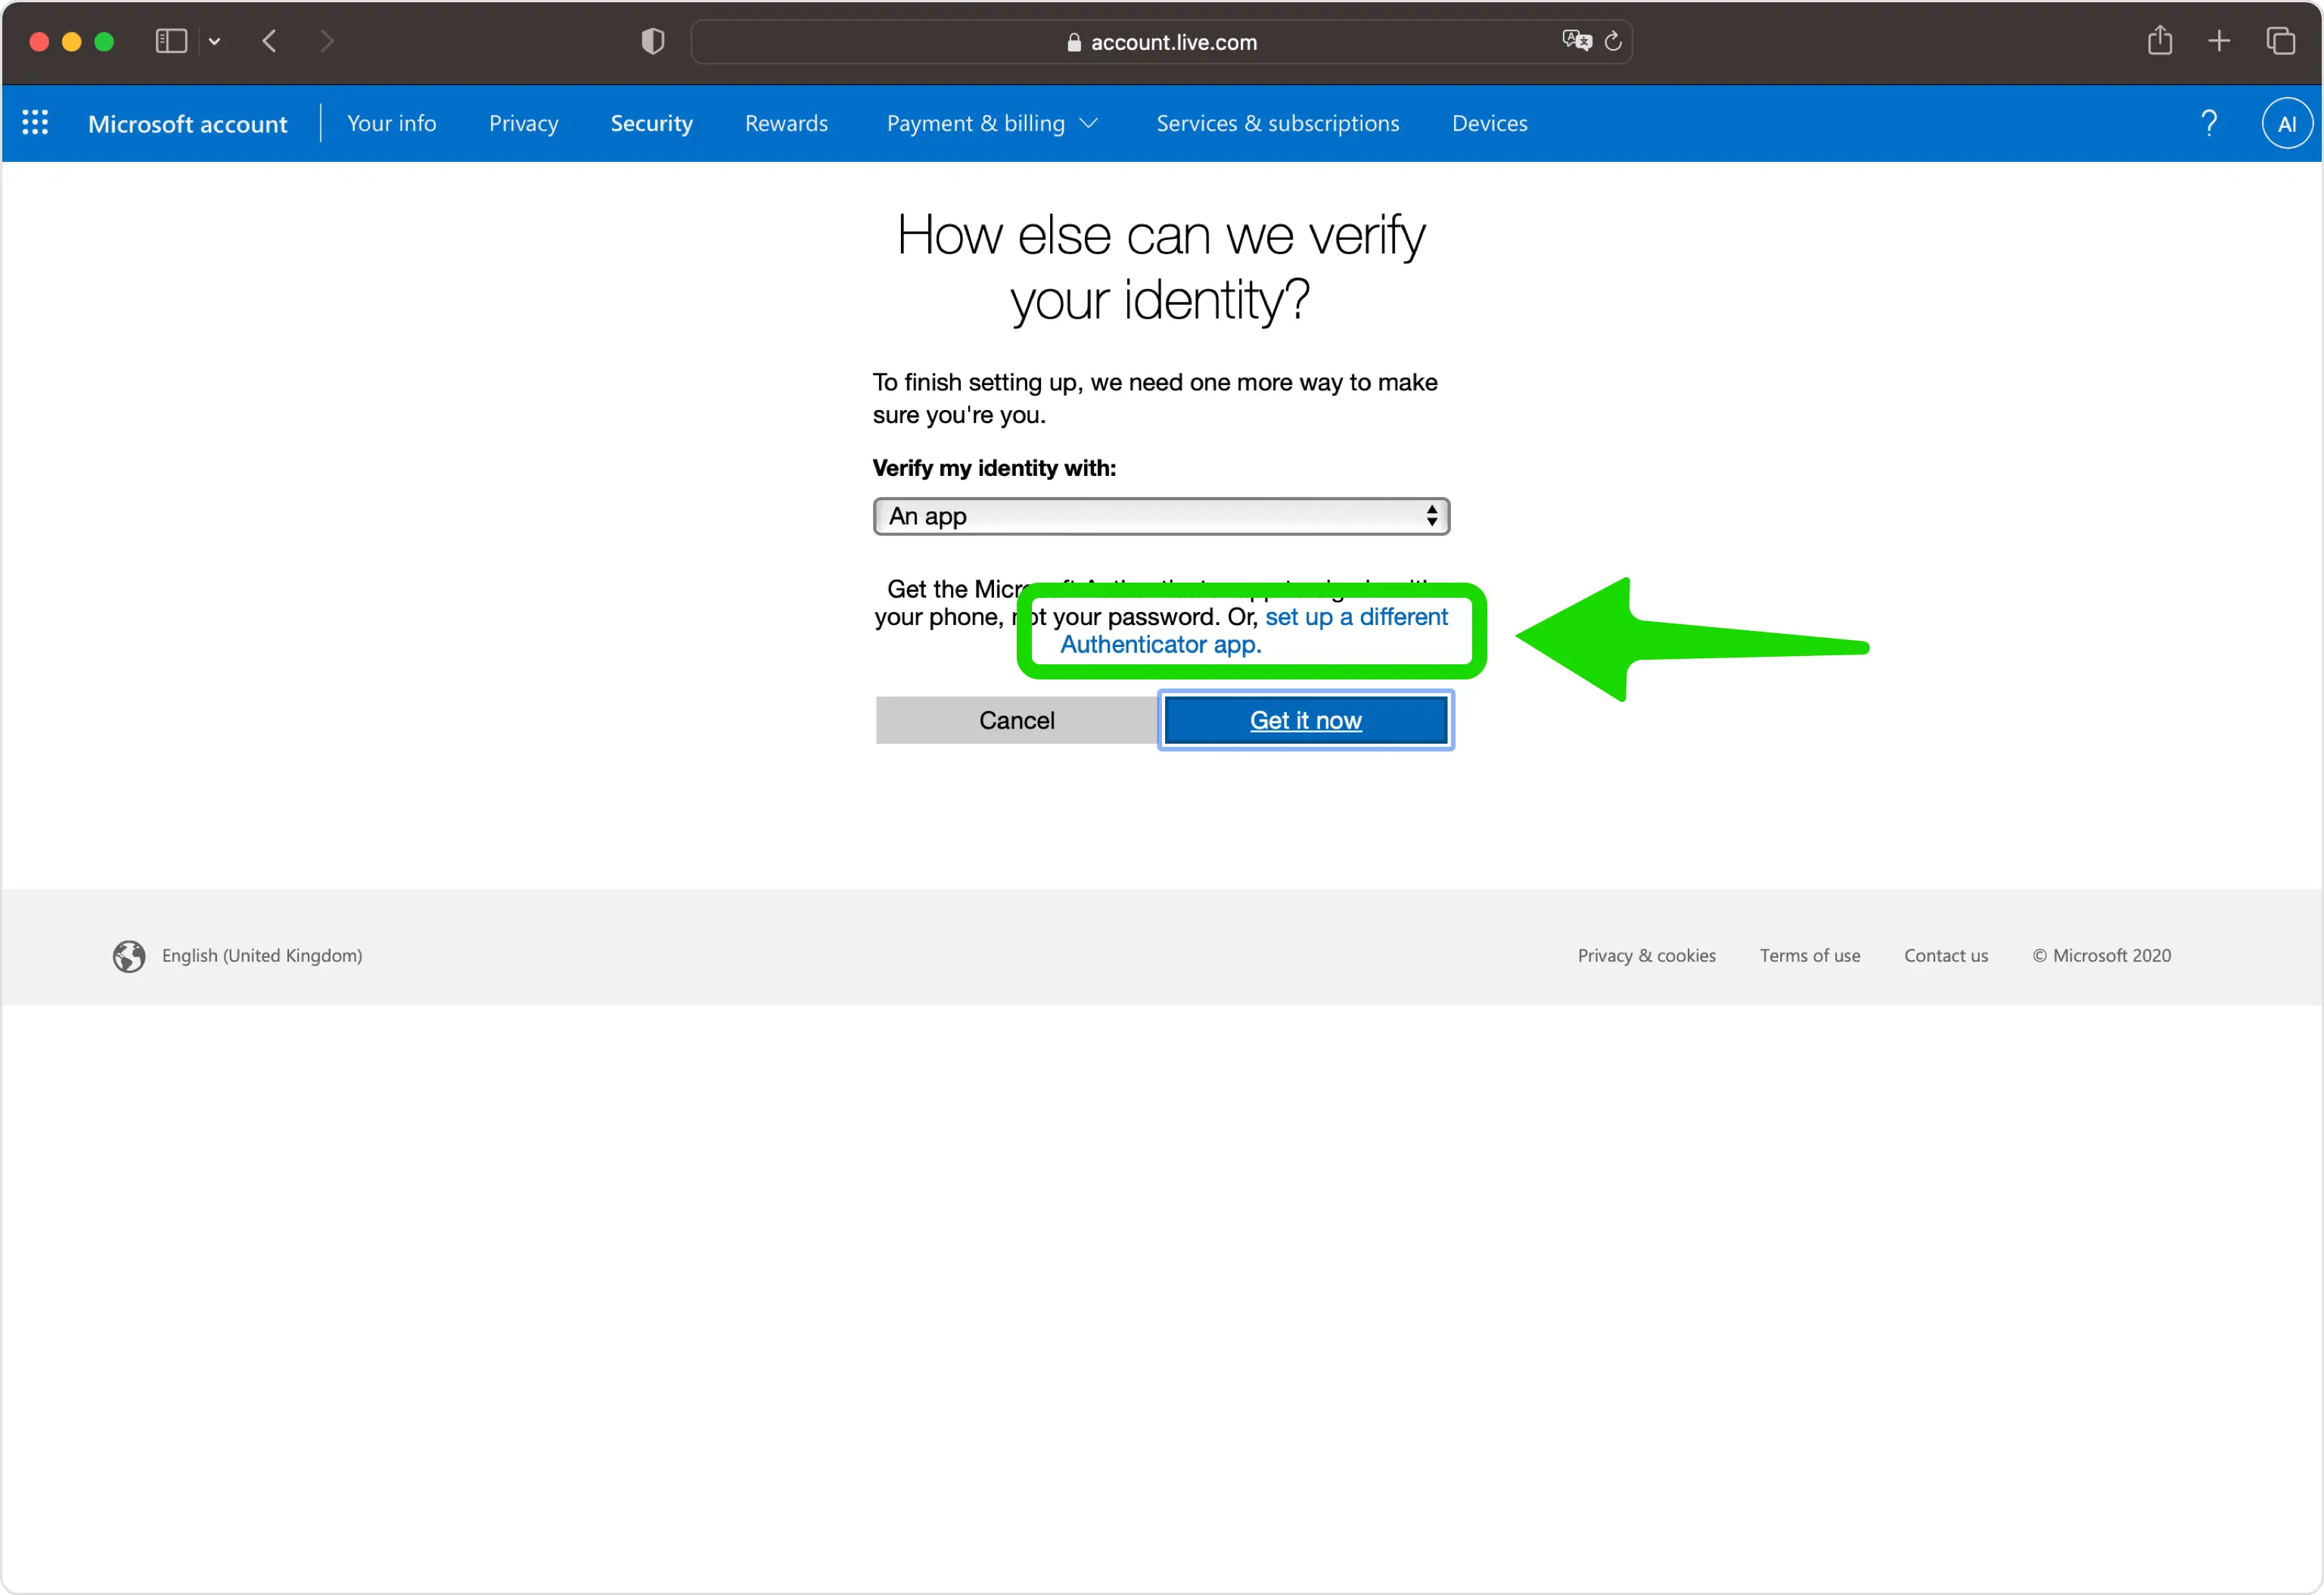
Choose to set up a different Authenticator app
Select "Set up a different Authenticator app" so you can use your own Authenticator App rather than the Microsoft one.
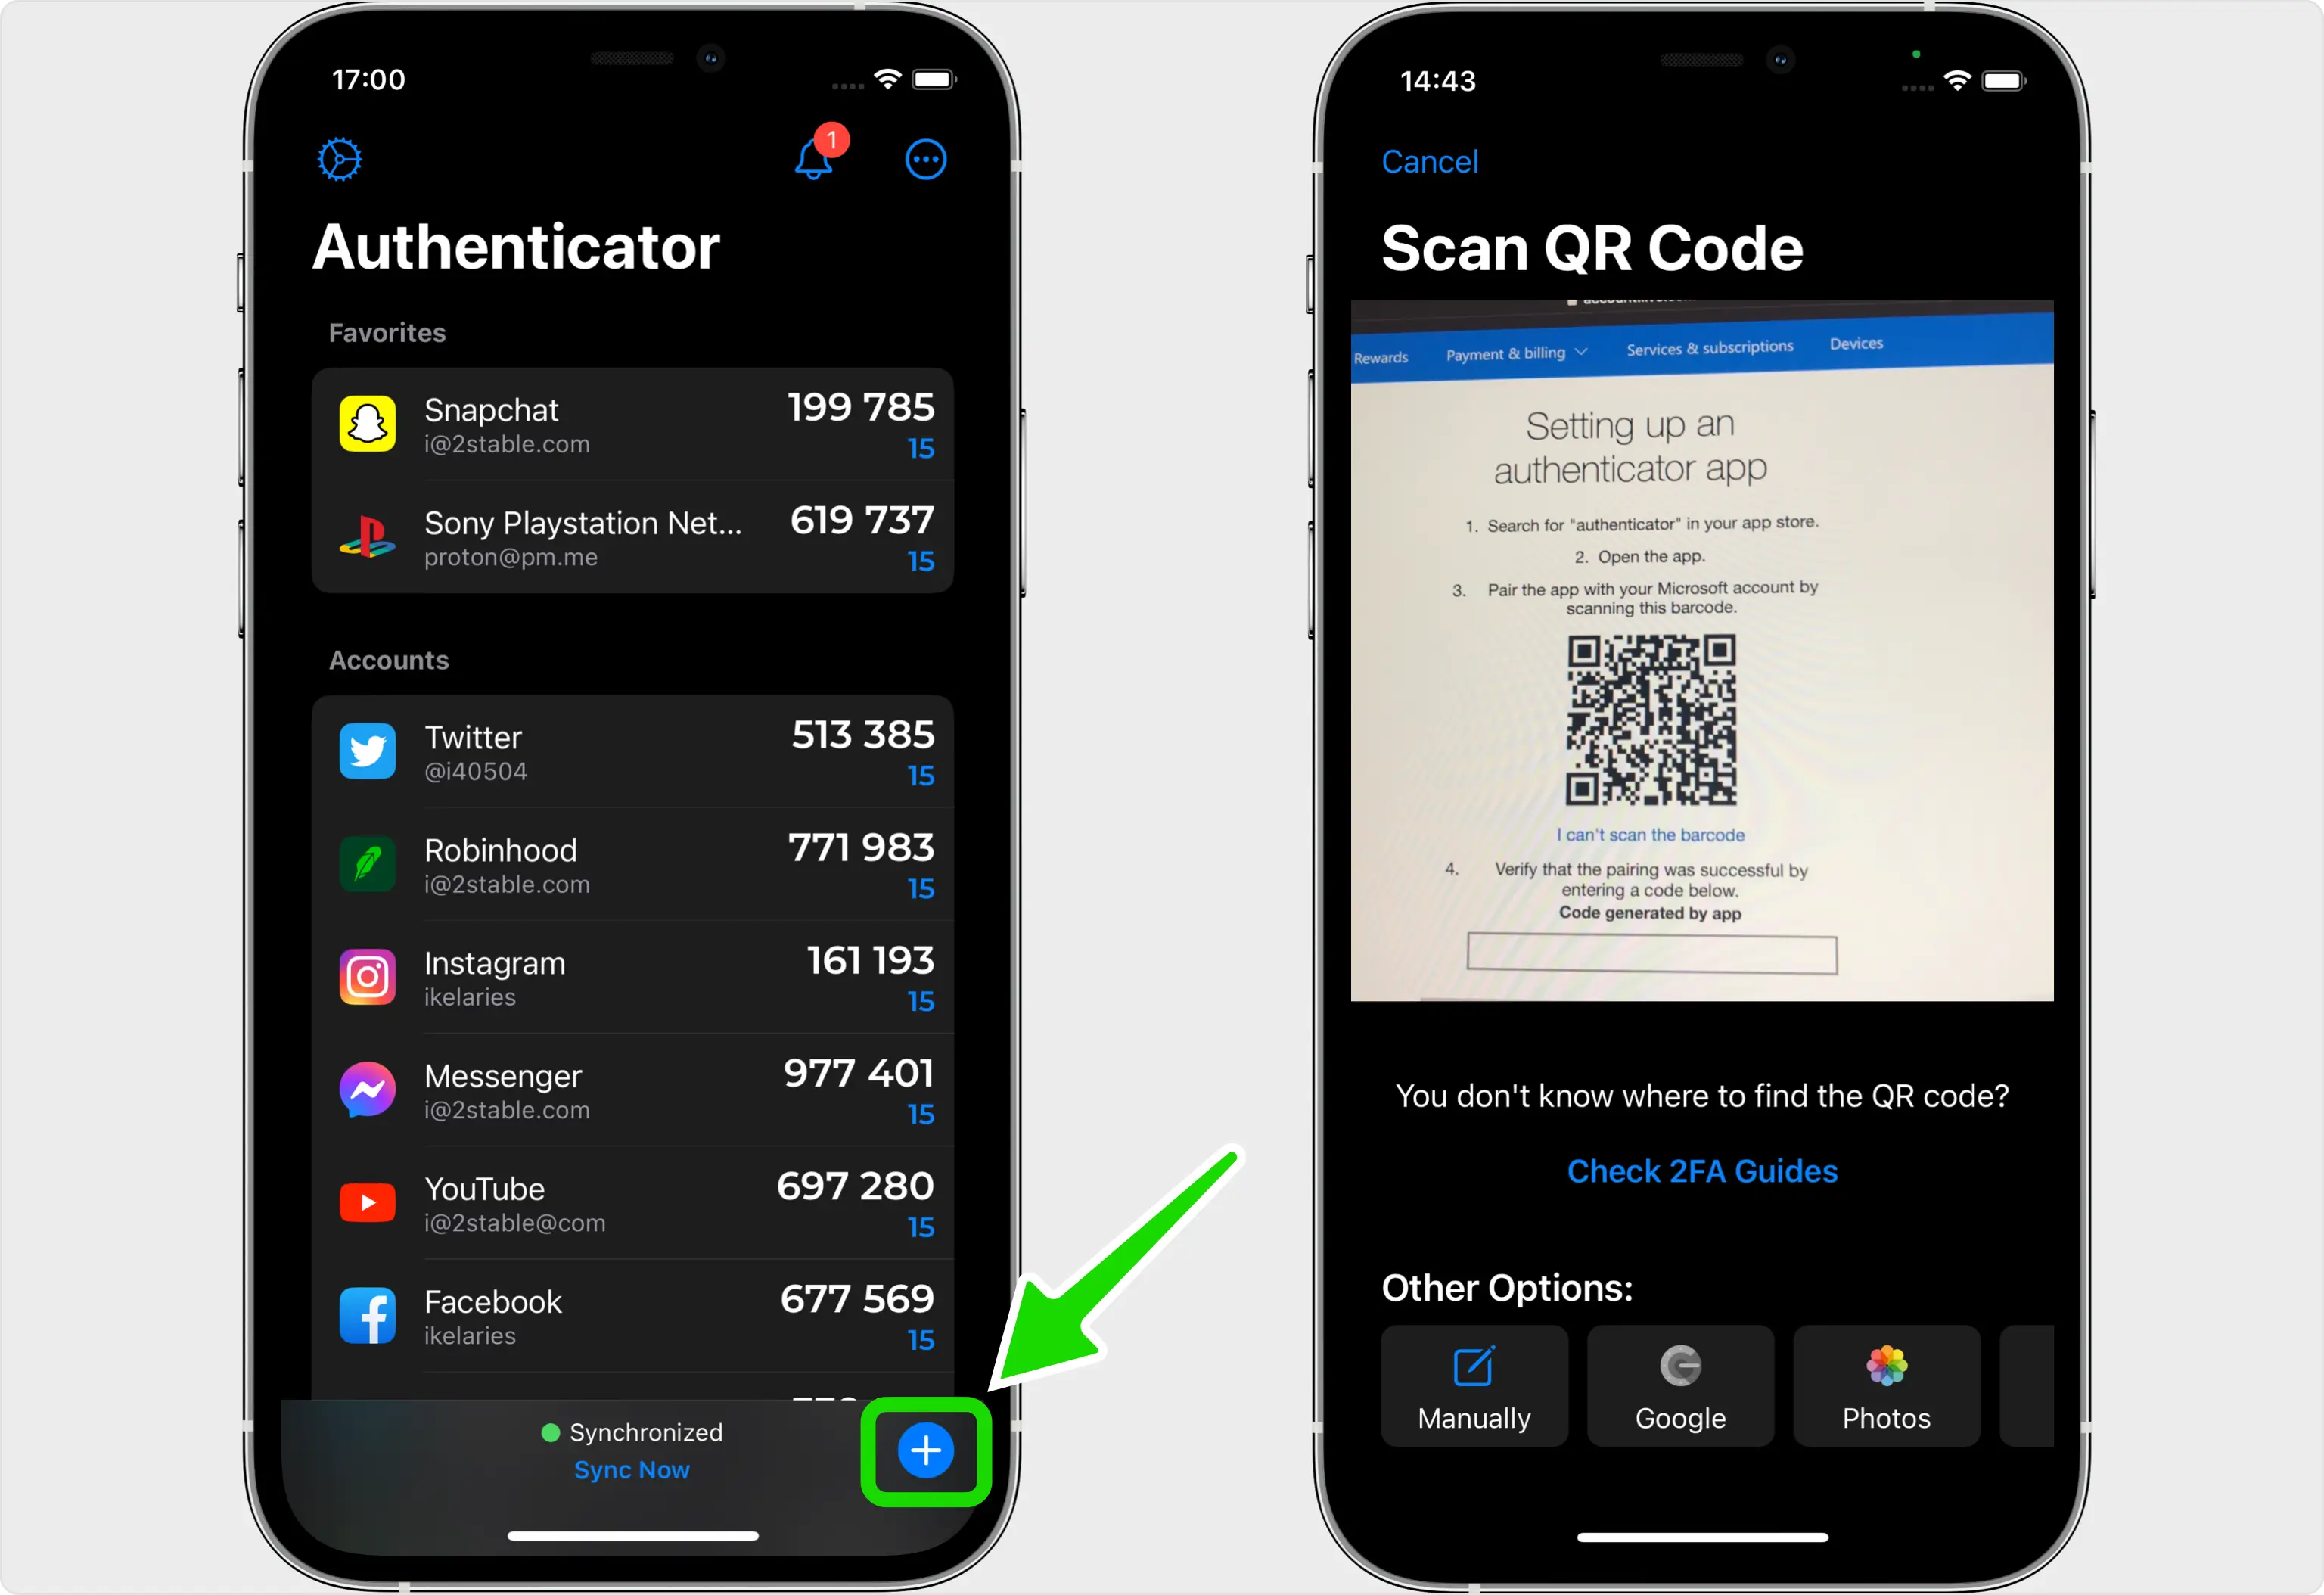
Reveal the QR code
Microsoft displays a QR code that holds your secret key. Leave this page open on your computer while you pick up your phone.
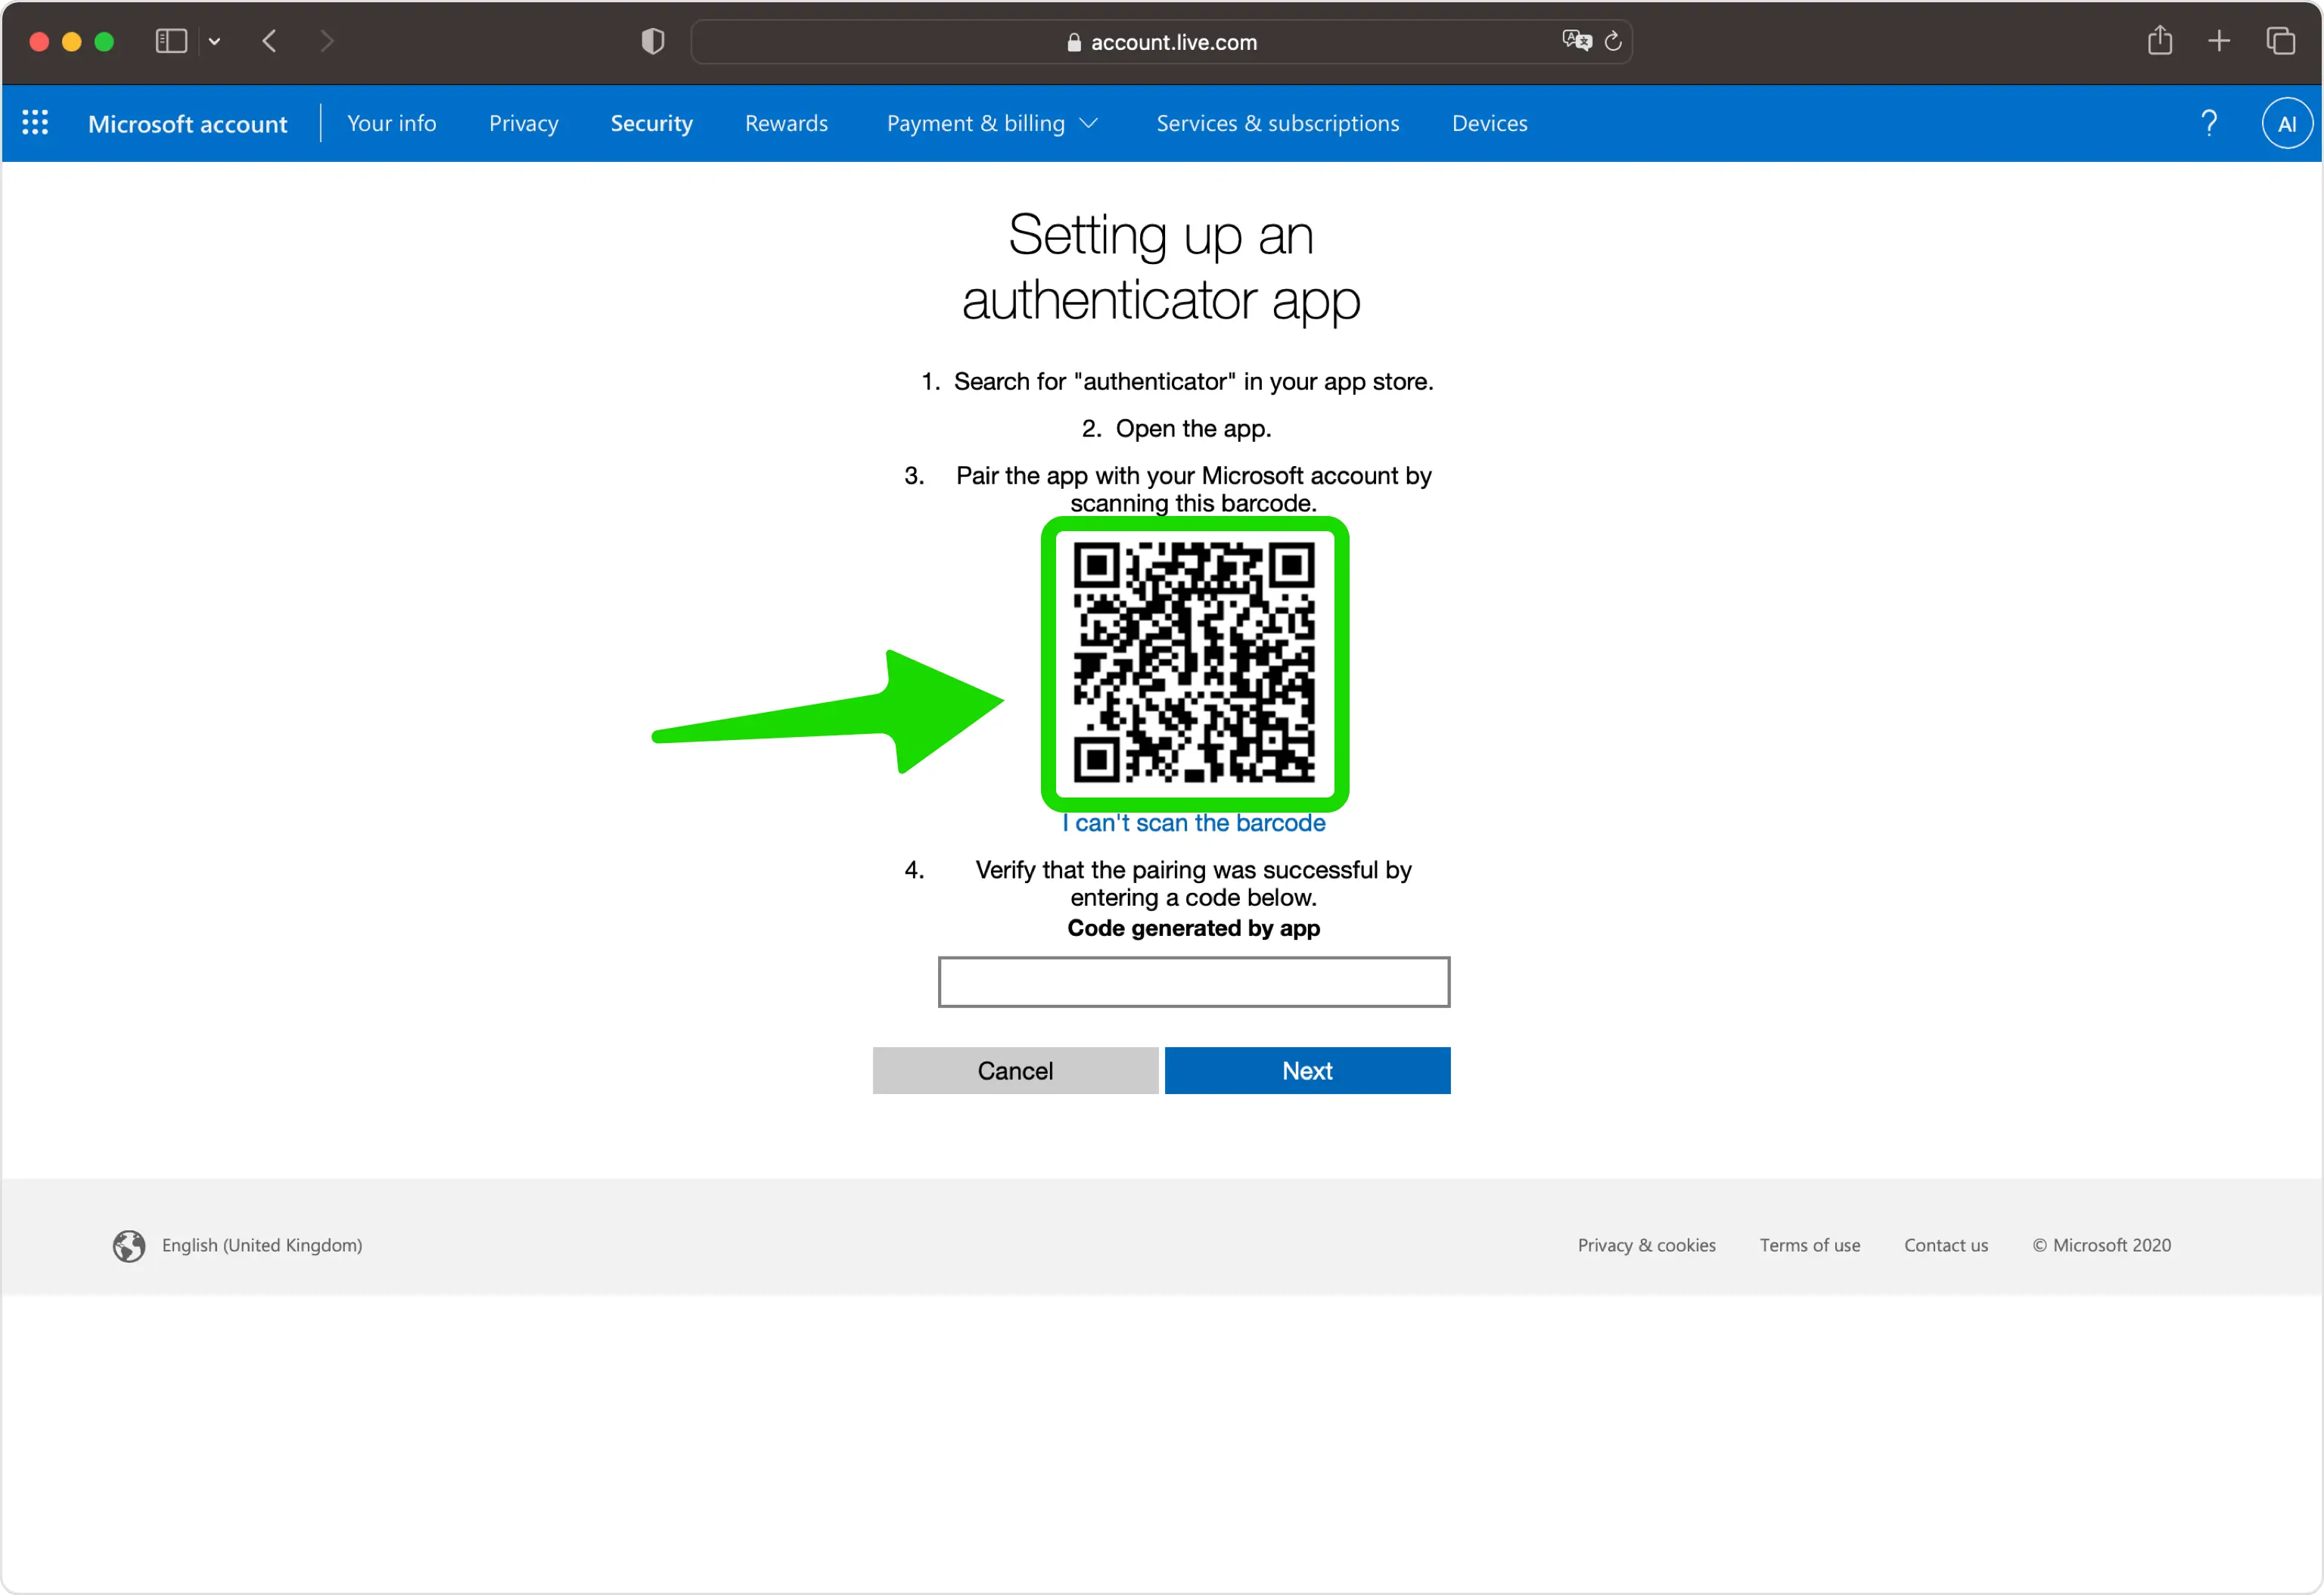
Scan the QR code with your Authenticator App
Open the Authenticator App on your iPhone, tap the + button, and point your phone at the screen to scan the QR code Microsoft shows. If you can't scan it, choose "I can't scan the bar code" and enter the secret key manually instead.
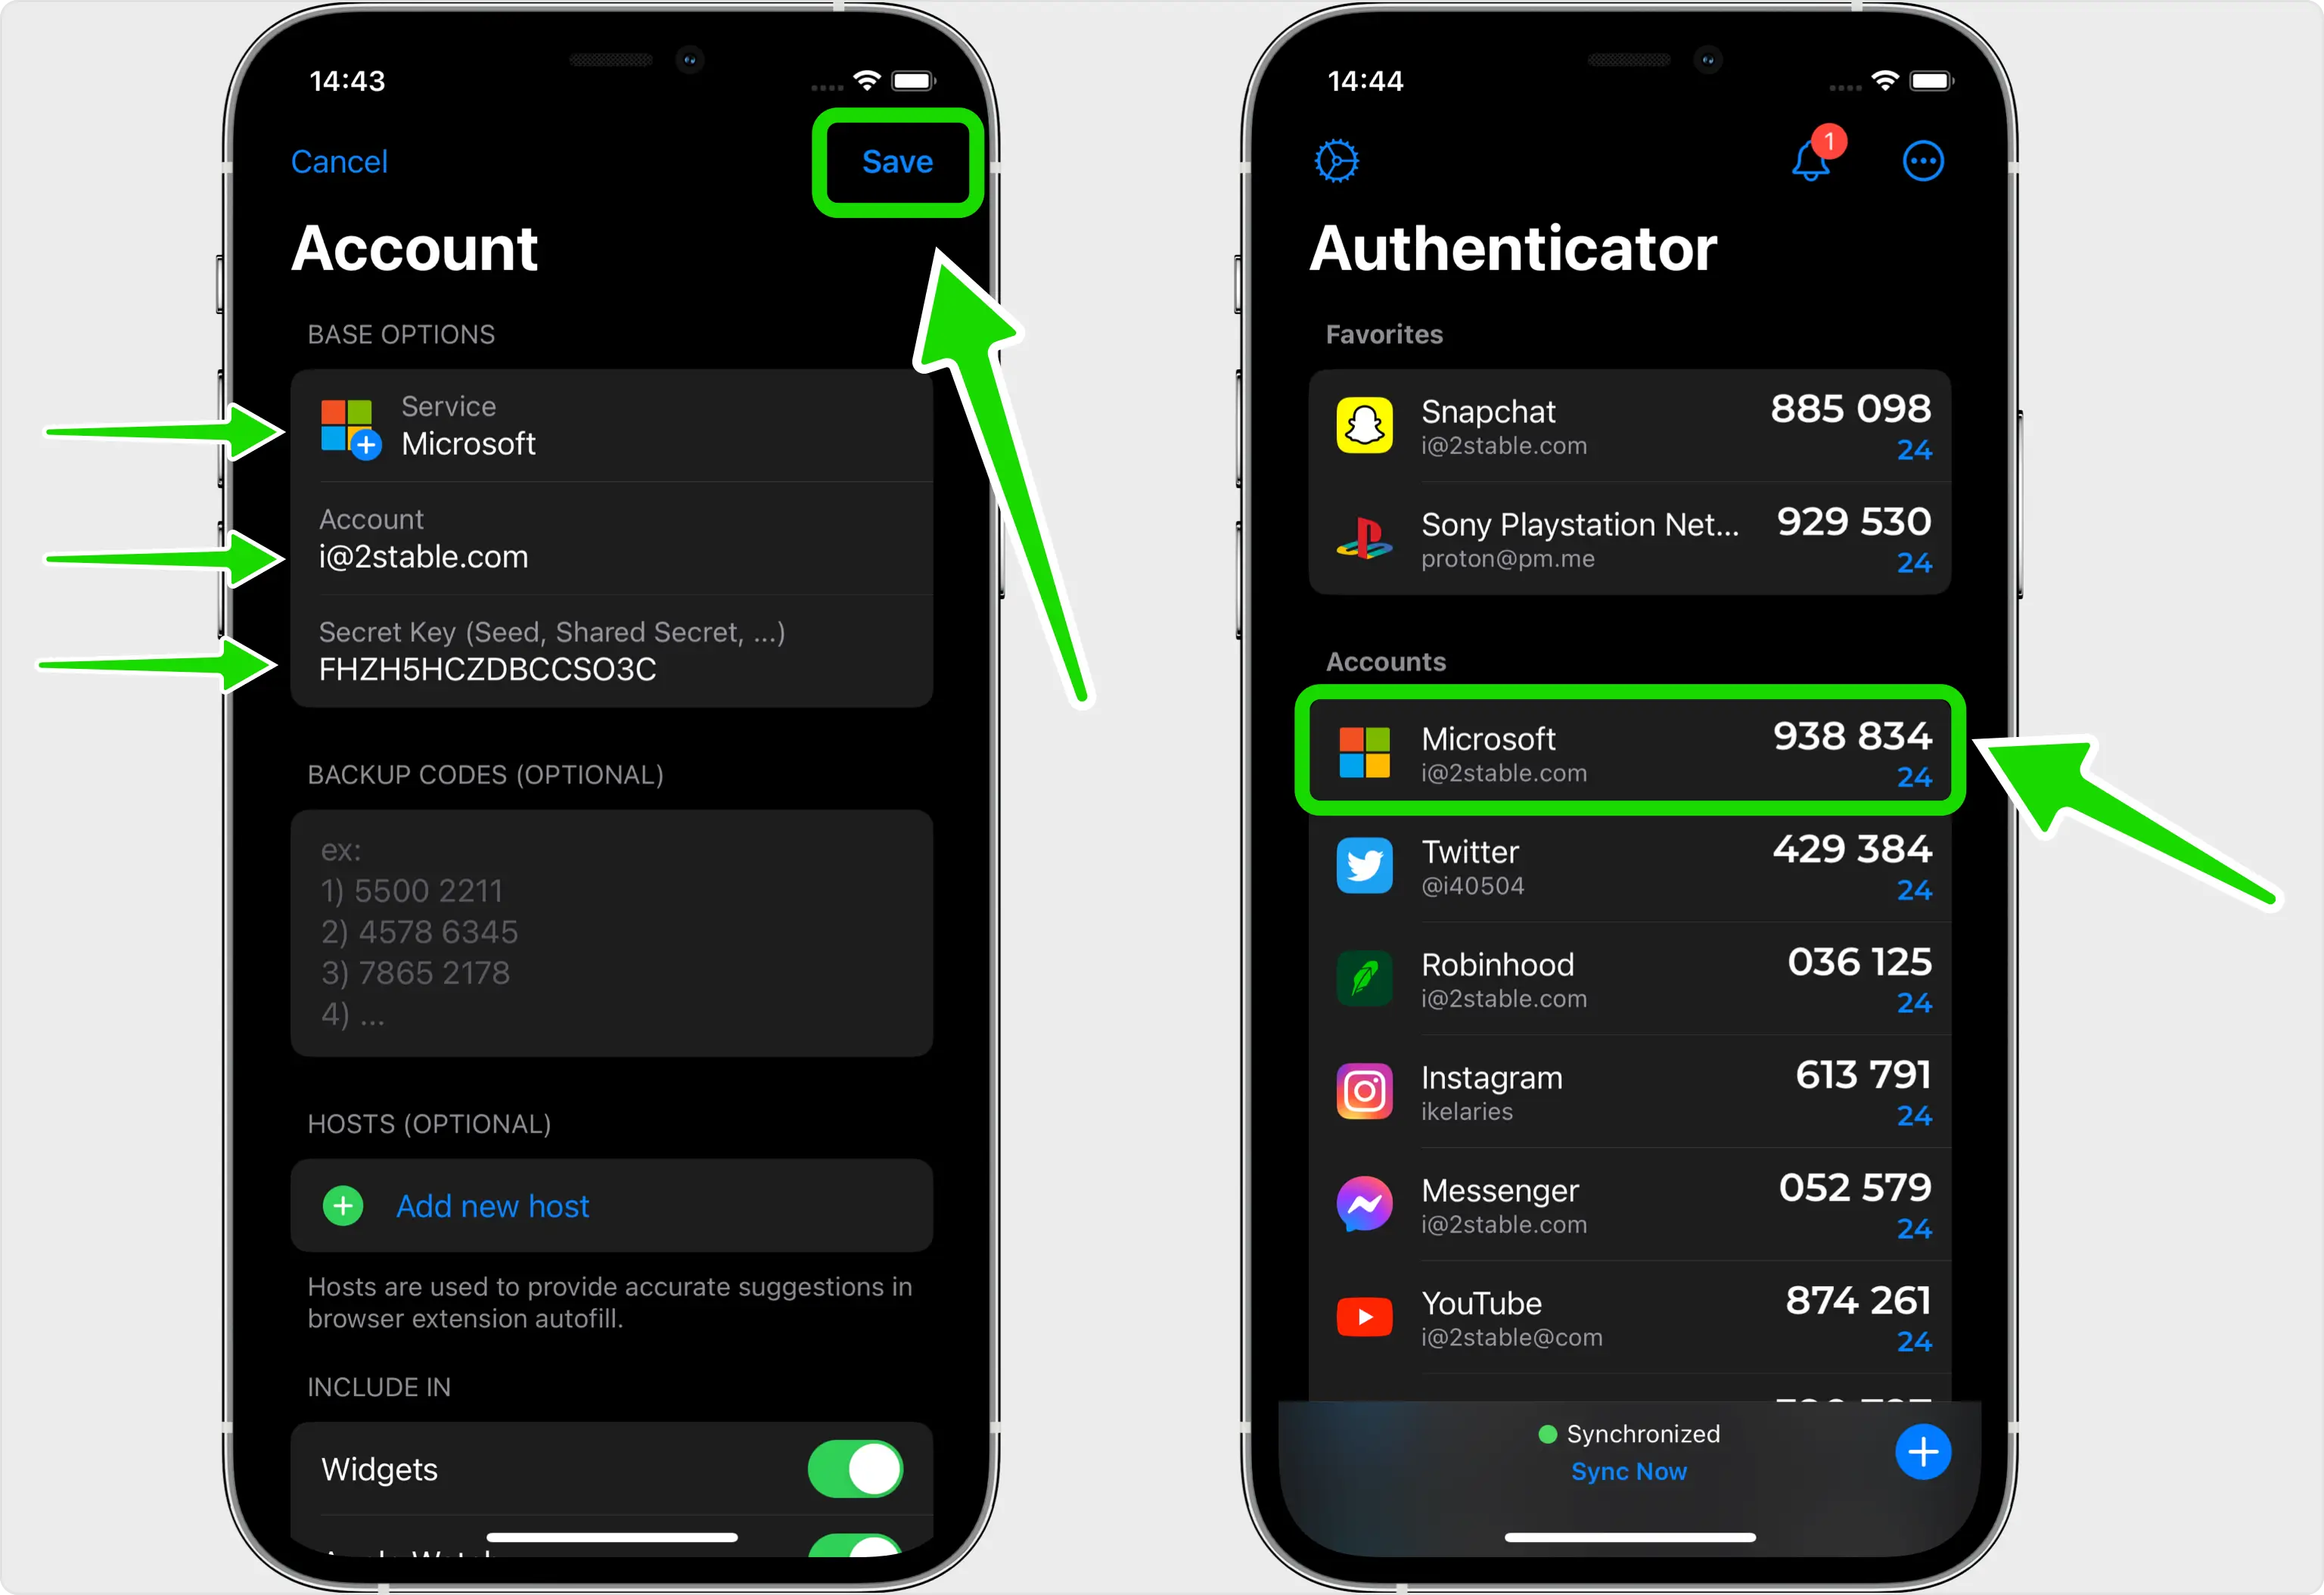
Save the account in your Authenticator App
After scanning, the Authenticator App fills in the Microsoft account name and secret key automatically. Tap Save to store the new entry, which then begins generating codes.
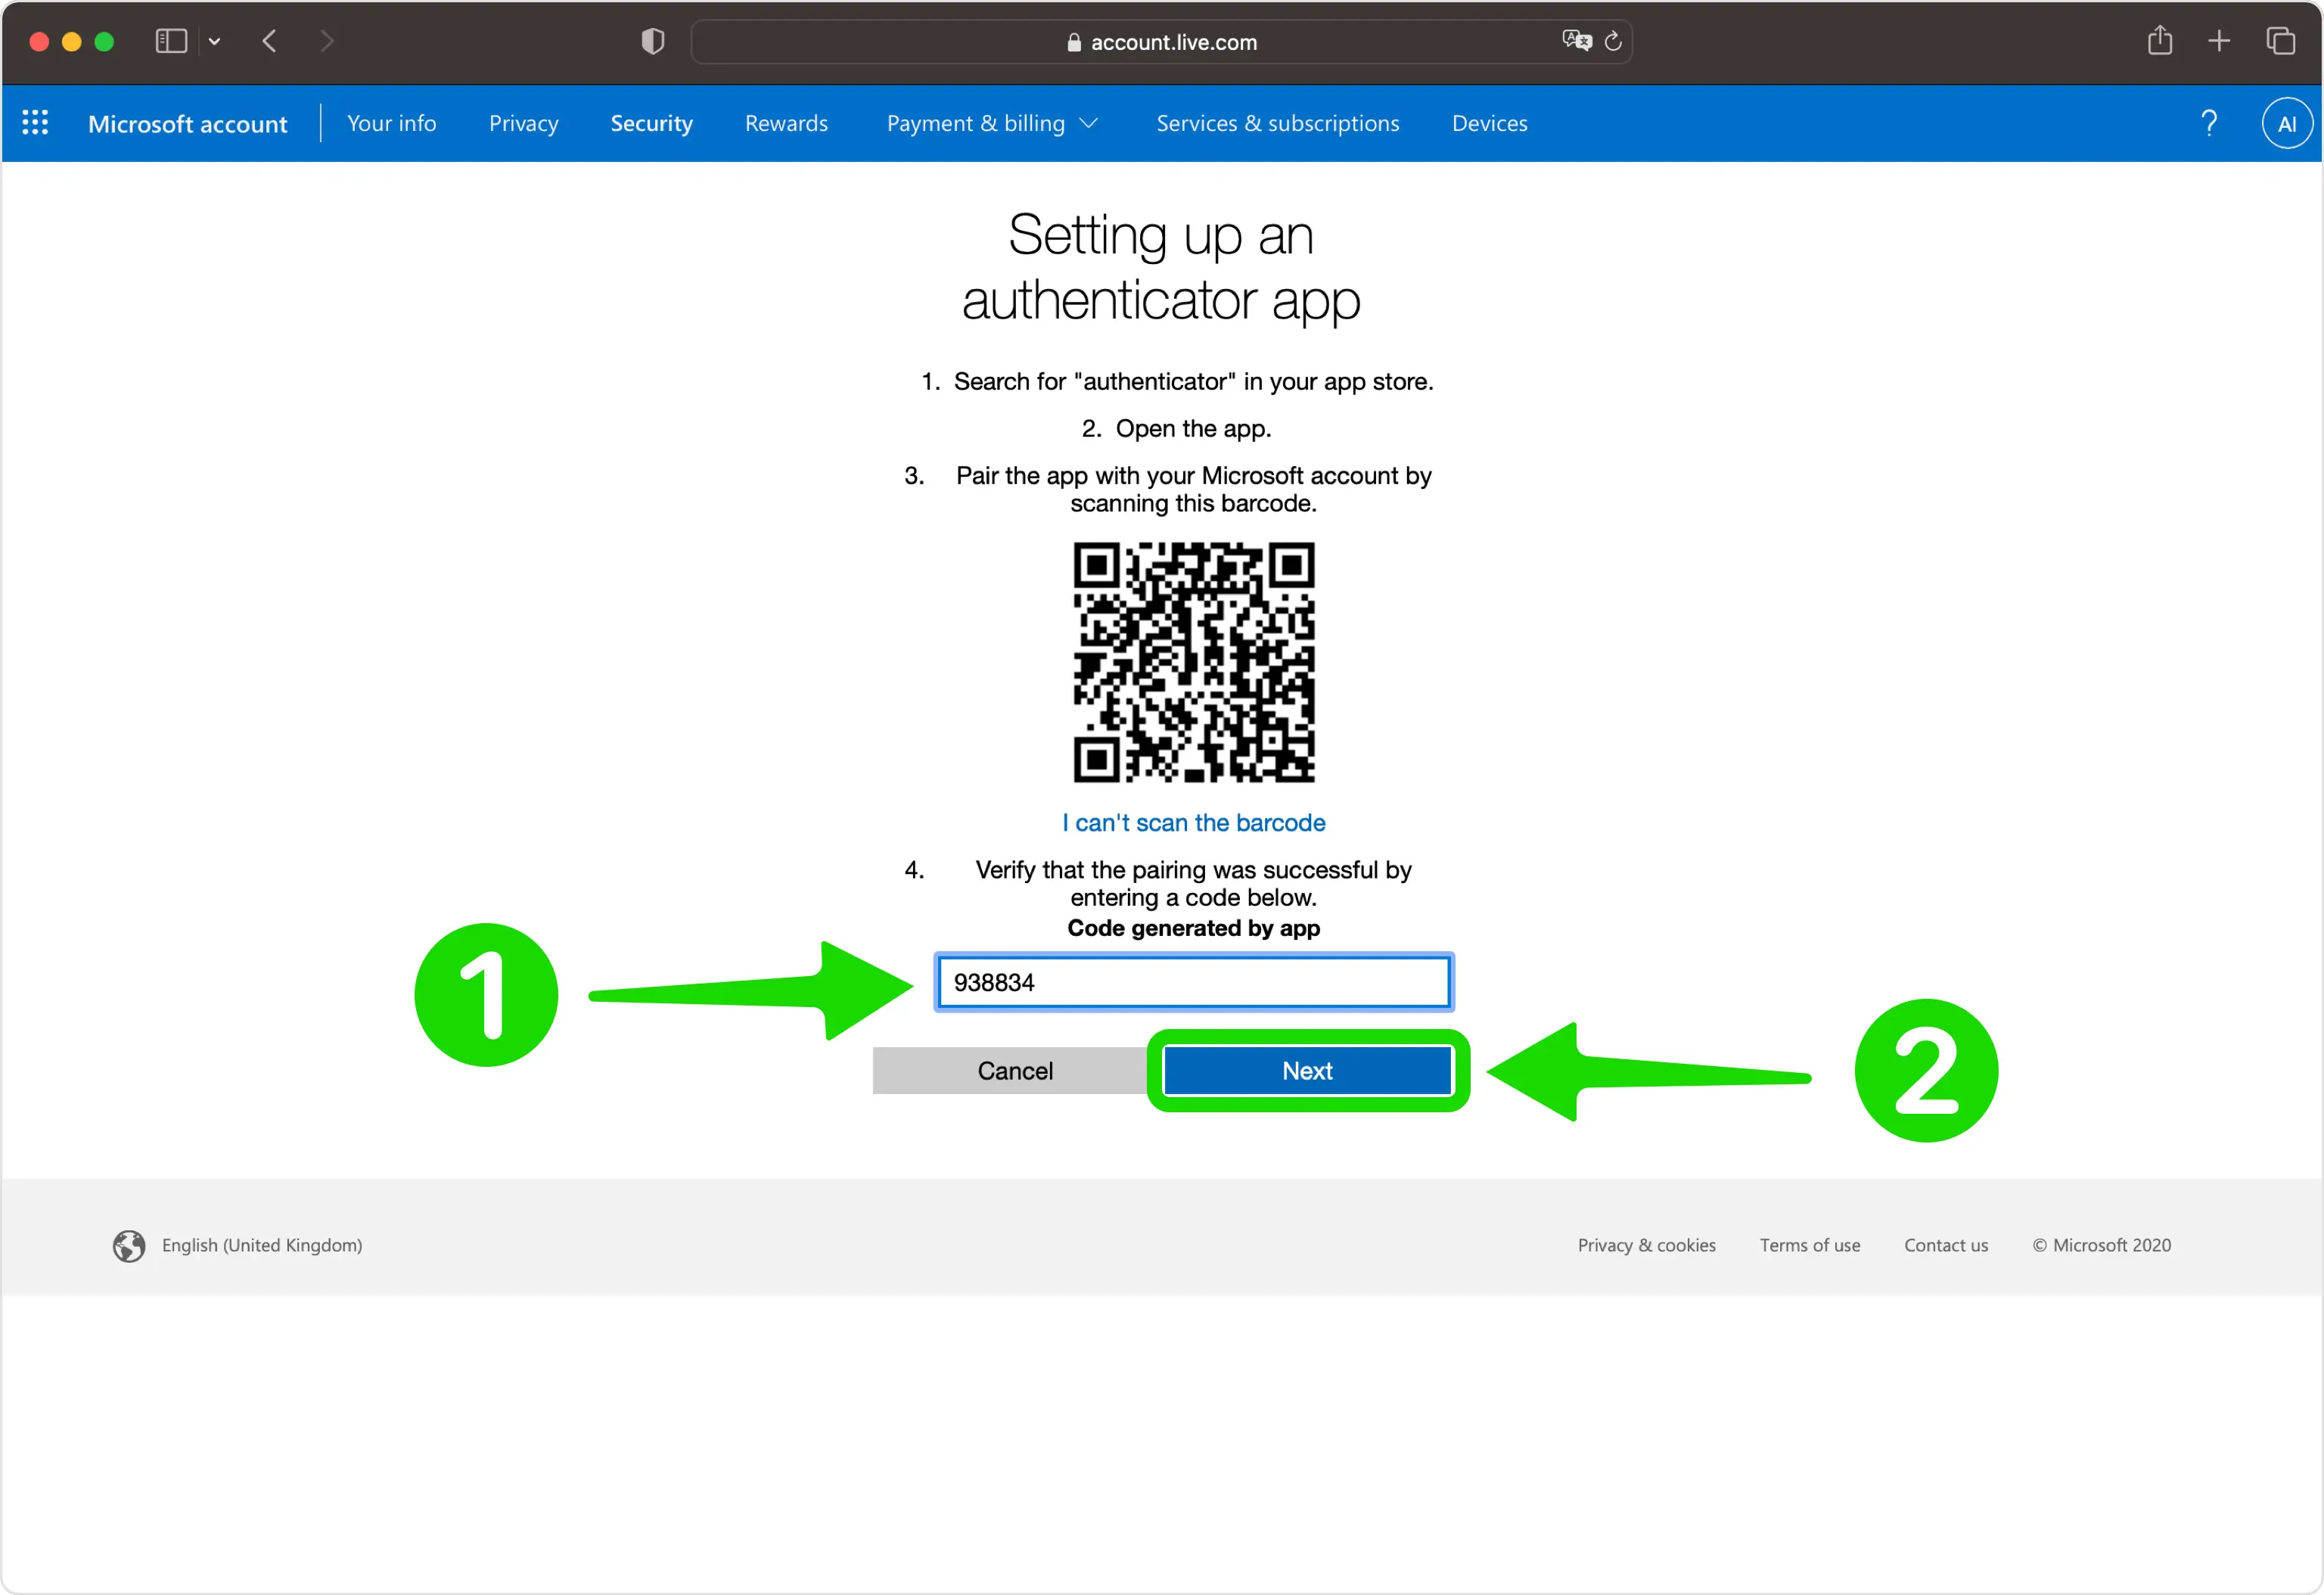
Enter the 6-digit verification code
Back on the Microsoft page, type the current 6-digit code from your Authenticator App into the field, then click Next.
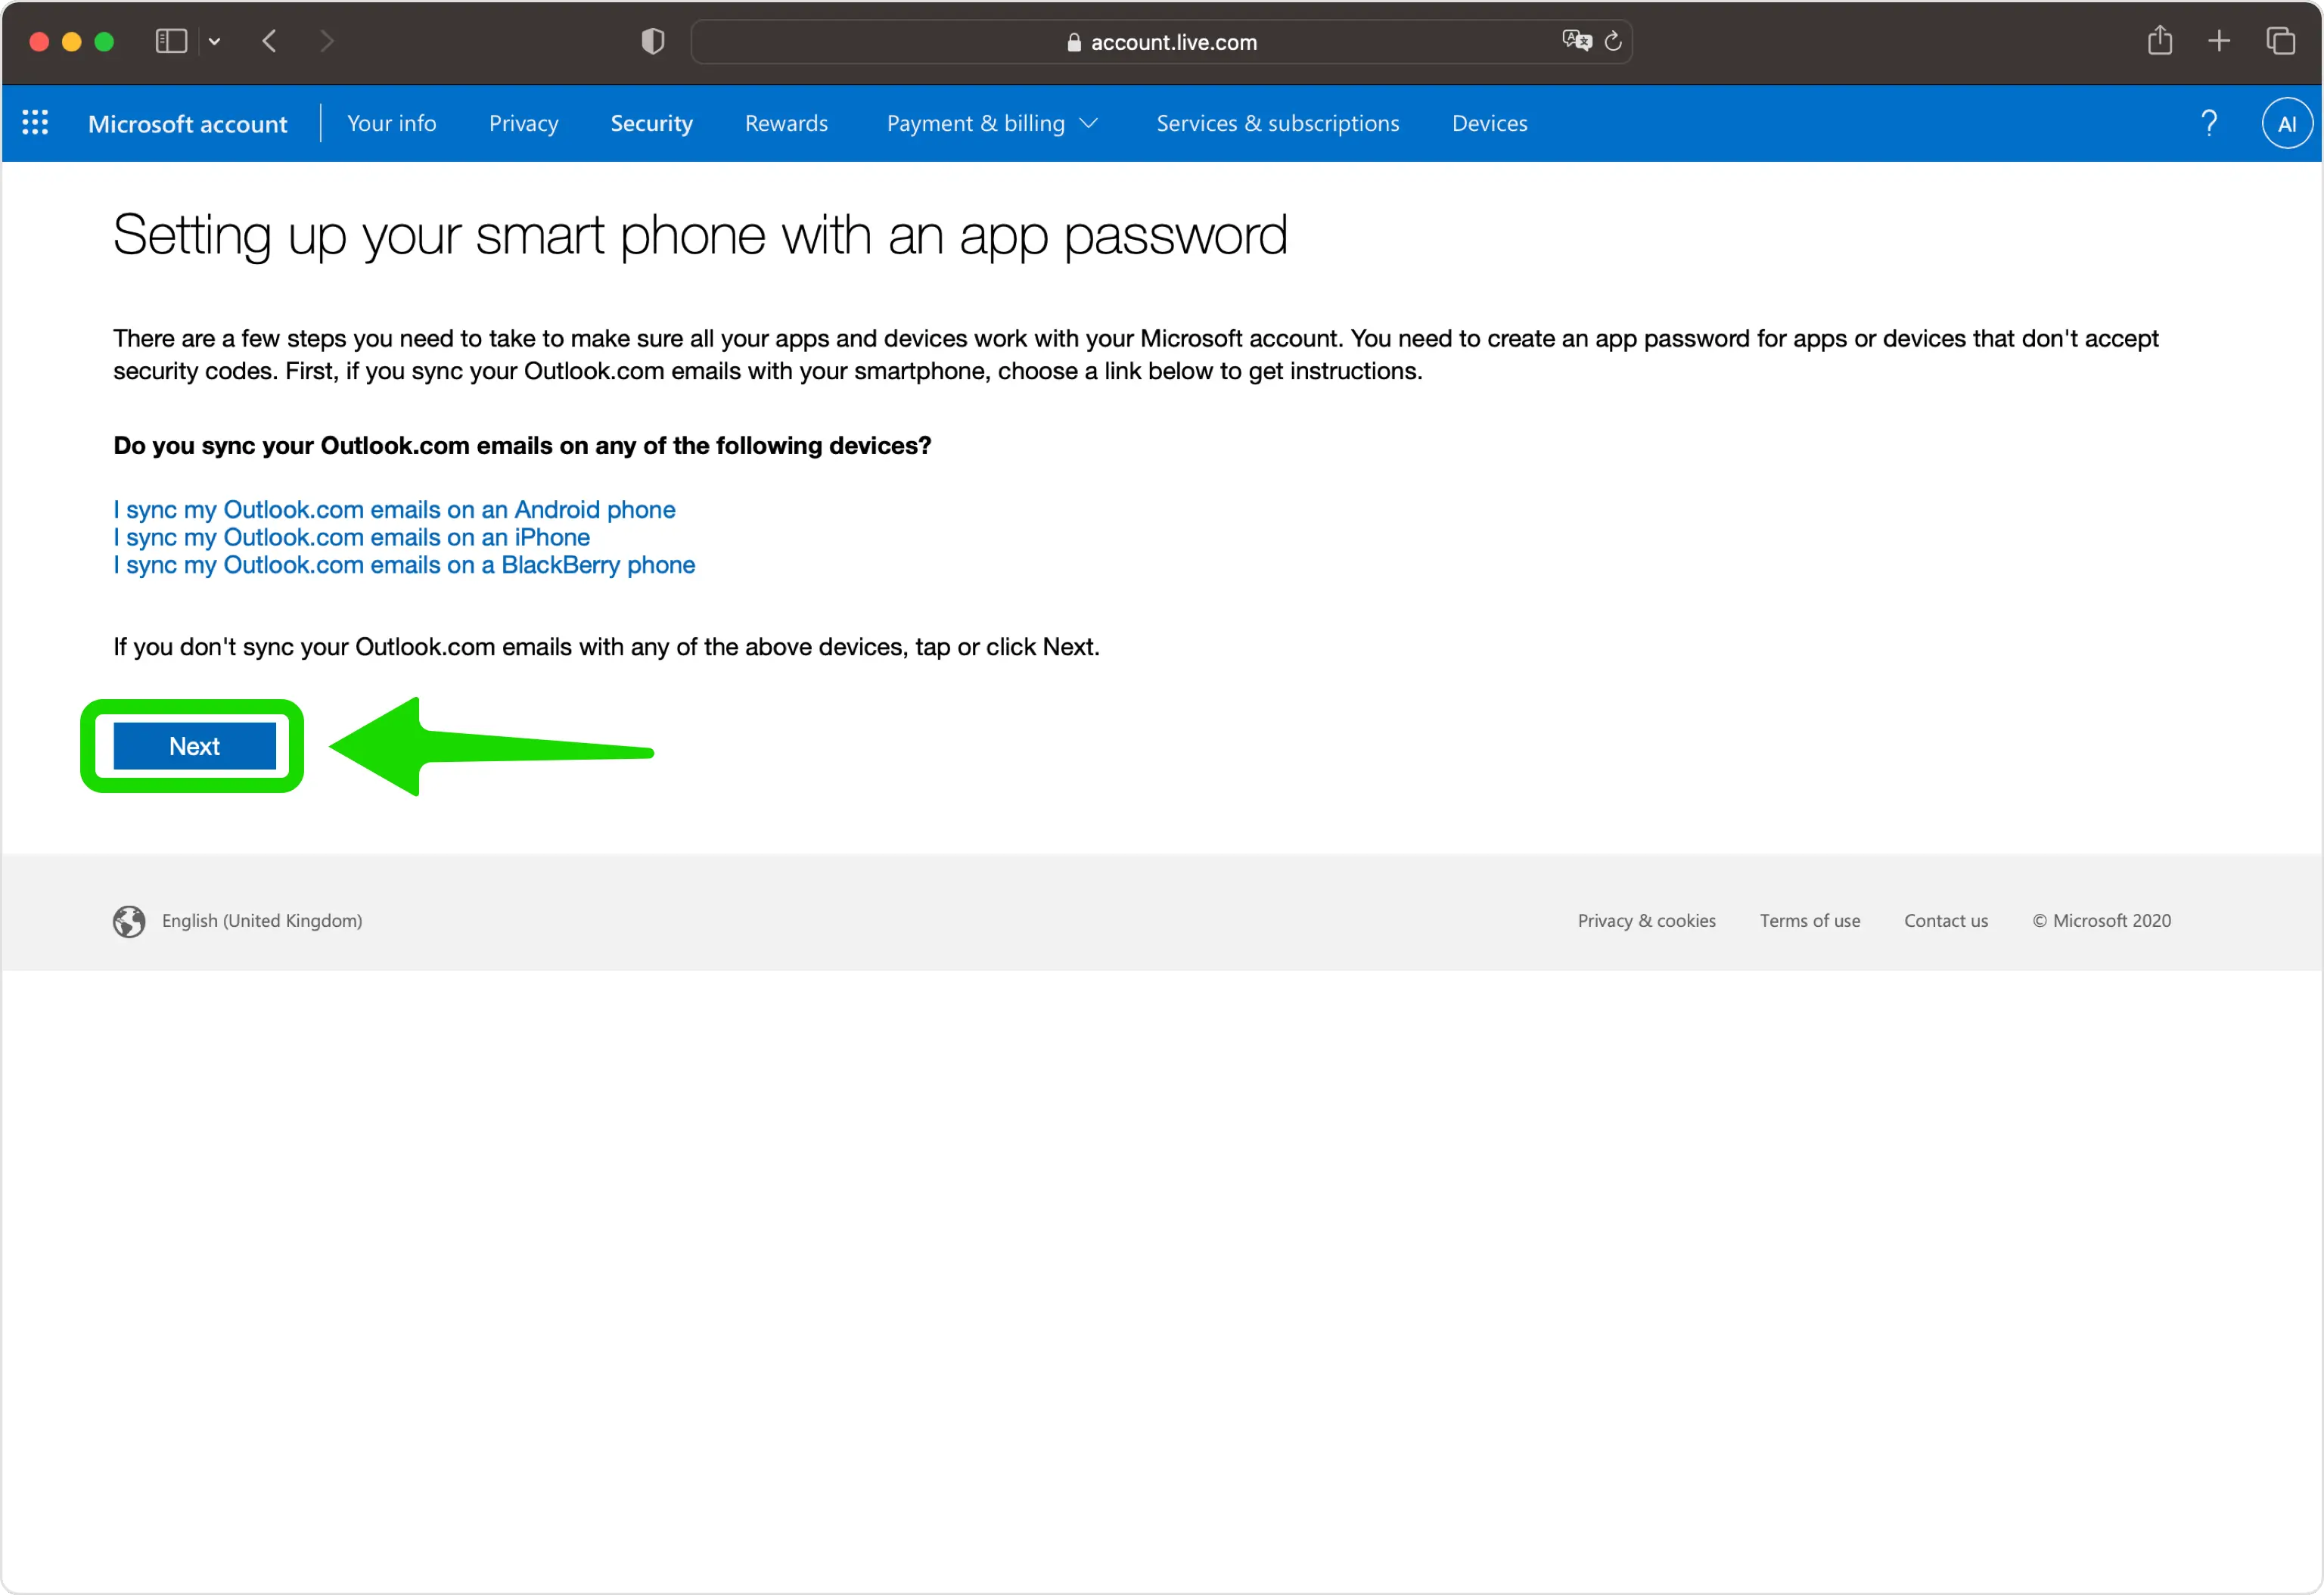
Continue to the final step
Once the code is accepted, click Next to move on to the last screen.
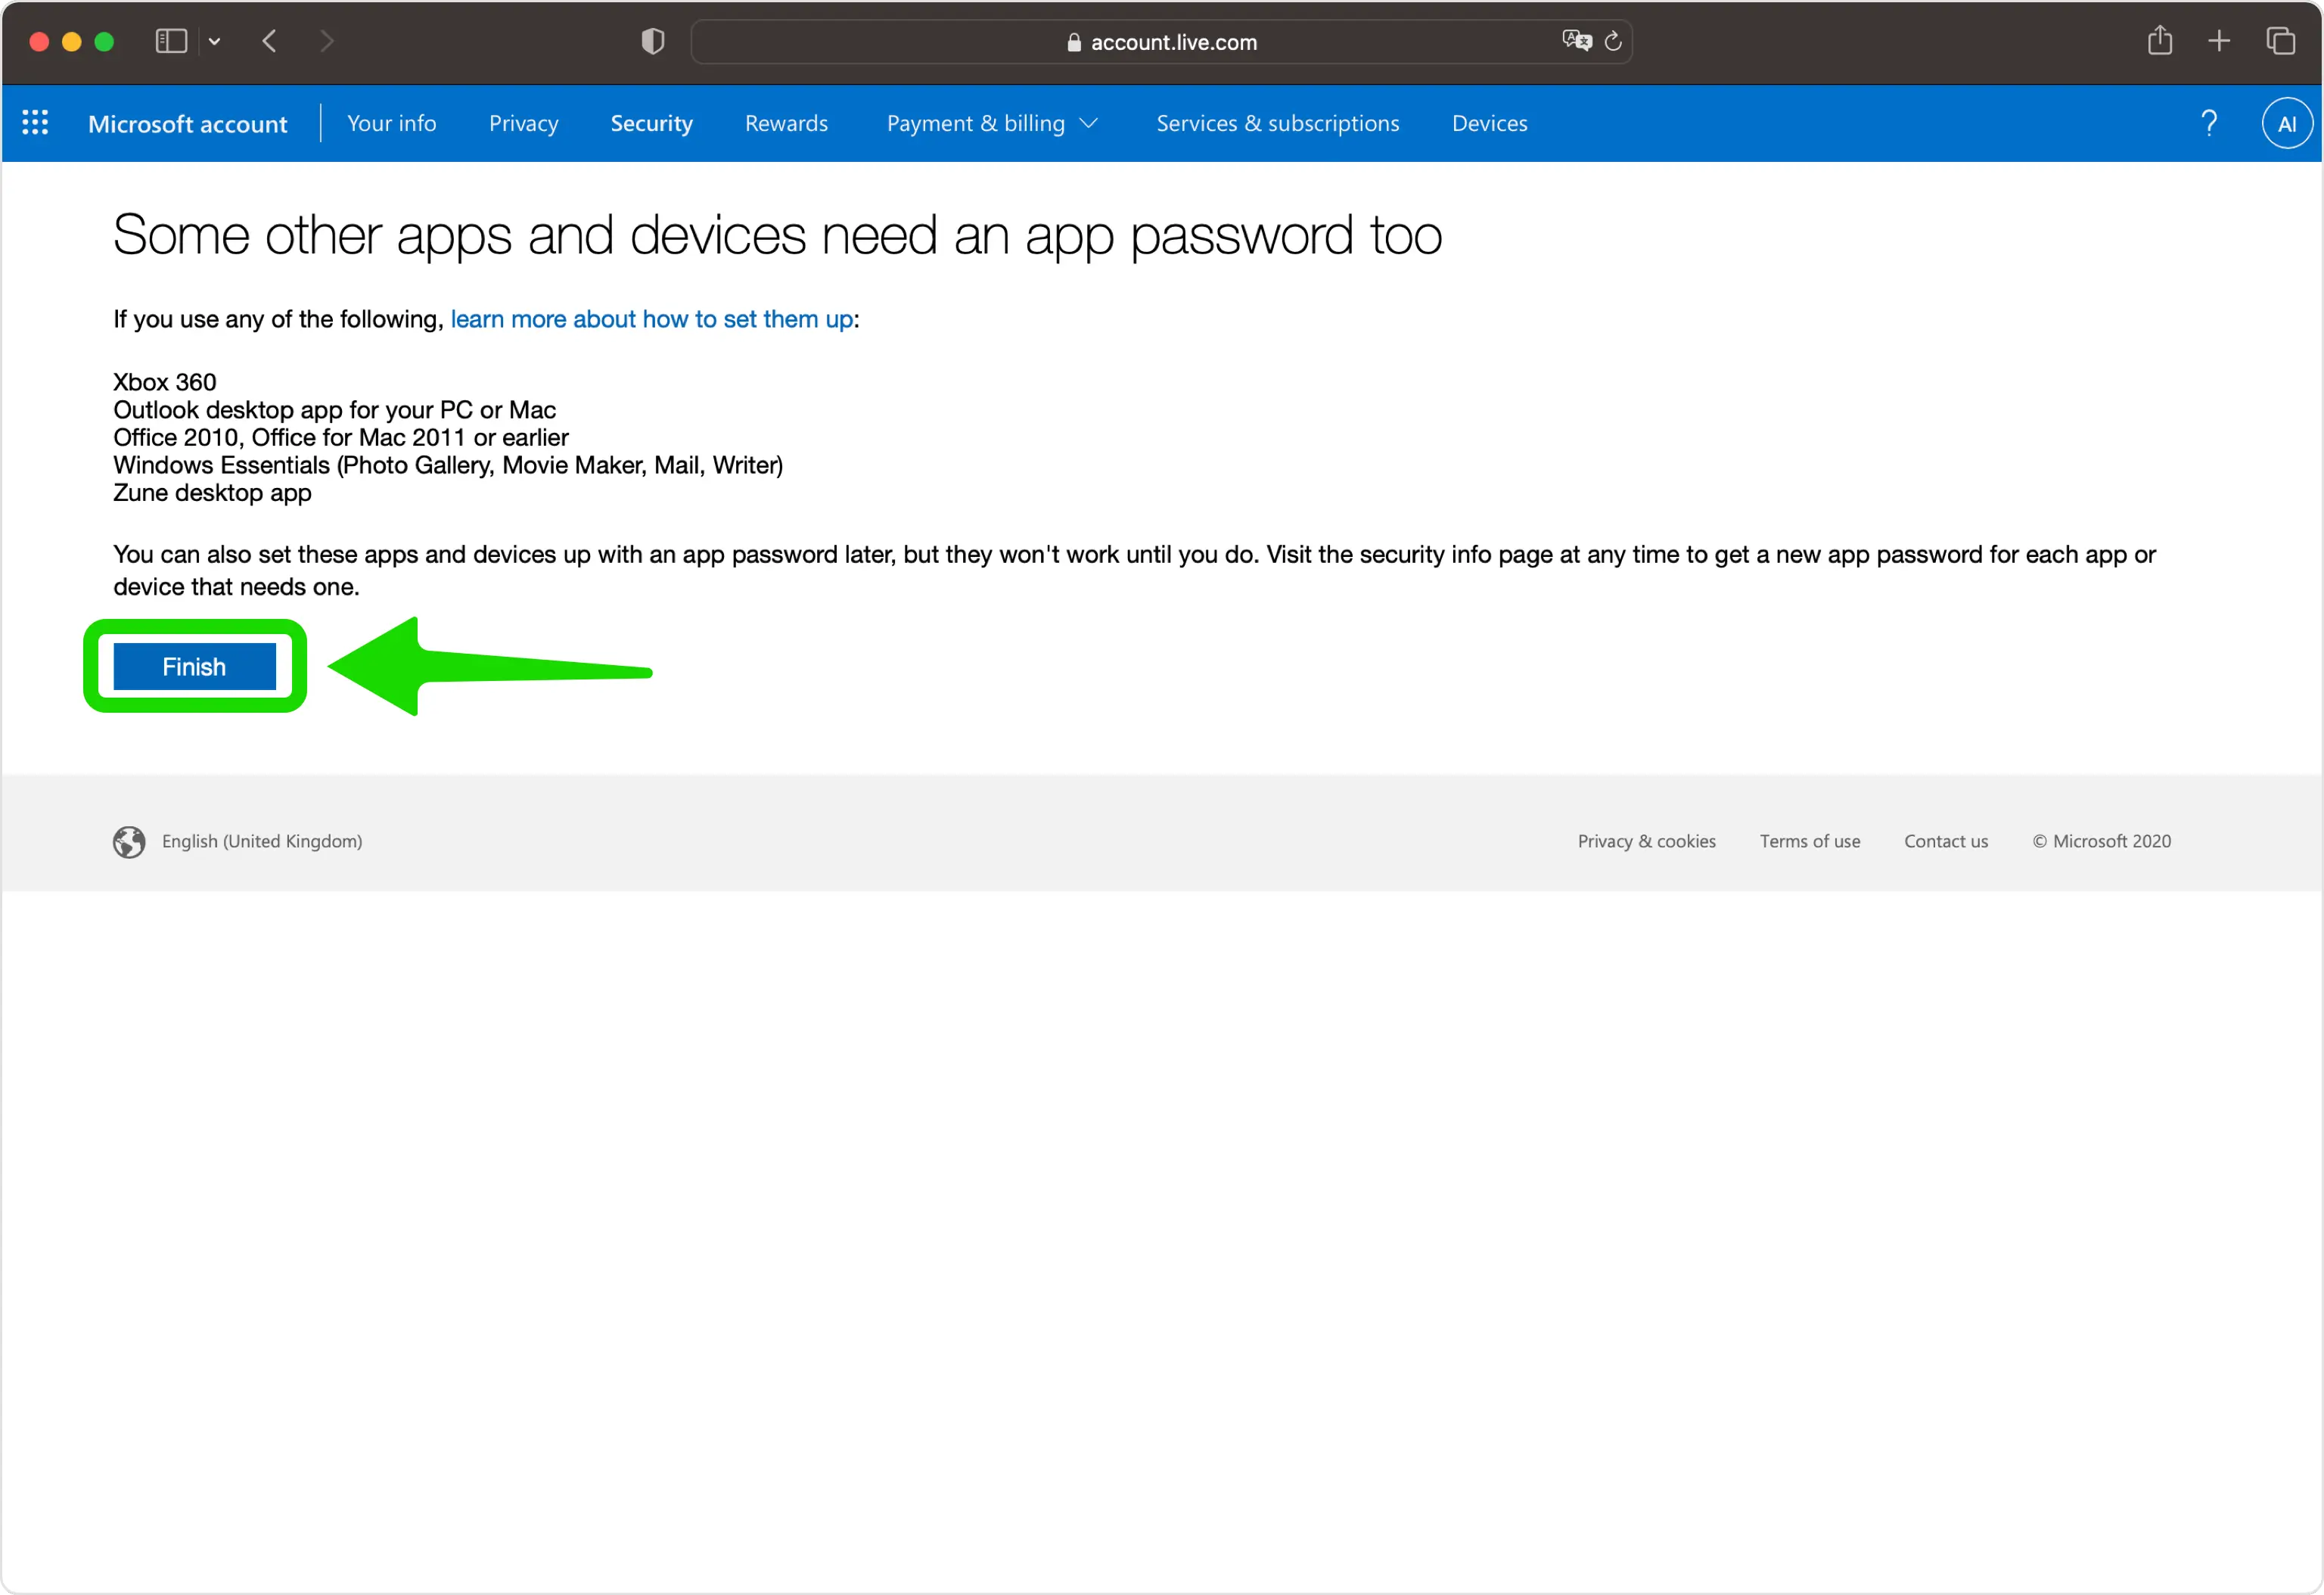
Finish setup
Click Finish to complete setup. Your Authenticator App is now a sign-in and verification method, and you'll use it whenever you log in. Microsoft doesn't show backup codes here, so afterward consider going back to Manage how I sign in to generate a single 25-digit recovery code and store it somewhere safe.
Backup & recovery
Microsoft does not show backup codes during authenticator setup. Instead it offers a single 25-digit recovery code, generated separately under Security > Manage how I sign in > Recovery code > Generate a new code (account.live.com/proofs/manage/additional). It helps you regain access if you forget your password or lose your second factor. You can only view it while signed in; generating a new code invalidates the previous one, so print and store it somewhere safe (not on a device you sign in with).
That's it — your Microsoft account is now protected with two-factor authentication. If you have any issues during setup, visit the official Microsoft help page. Stay safe!
Related guides
Disclaimer
This content is for educational purposes only.
Begamob is not affiliated with or endorsed by Microsoft. All trademarks and product names are the property of their respective owners and are used solely for identification purposes. Interface labels and menu names may change over time — when in doubt, follow the official Microsoft documentation.